Evaluating the Quectel LG290P GNSS RTK Receiver and the Micoair LR900-F LoRa
I was recently given a Quectel LG290P GNSS RTK Receiver and a Micoair LR900-F LoRa to evaluate for use as a Rover in combination with an appropriate Base Station for outdoor autonomous RC car racing.
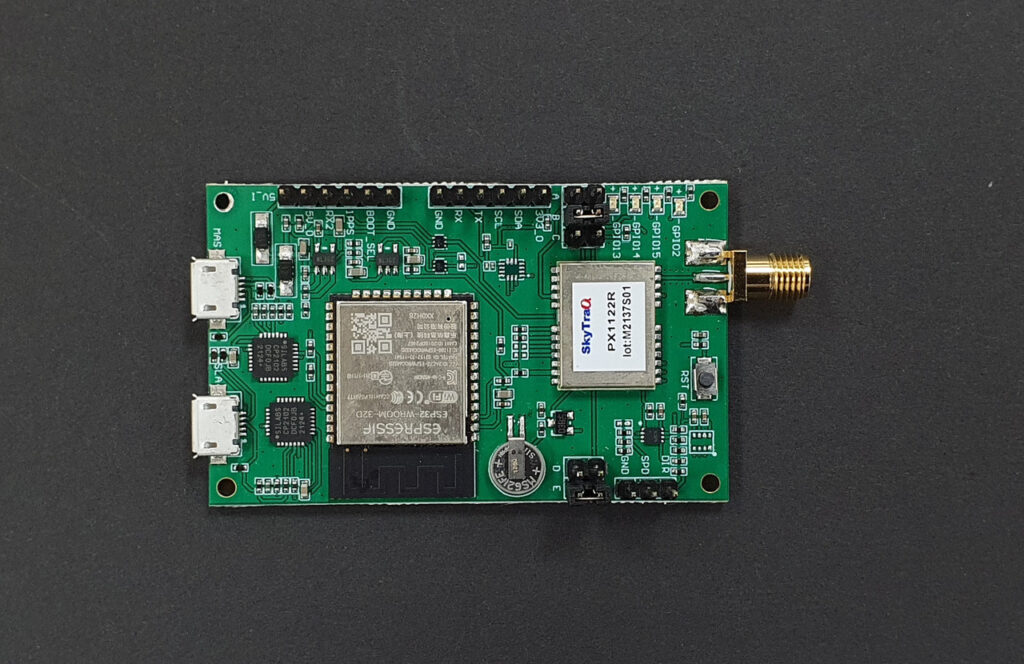
The Quectel LG290P GNSS RTK Receiver came in the form of a Sparkfun Quadband GNSS RTK Breakout Board and the Micoair LR900-F LoRa came as a two Telemetry Radio set.
The Hardware. The Quectel LG290P GNSS RTK module is a quad-band, multi-constellation, high-precision, RTK GNSS receiver. The module is capable of simultaneously receiving signals from the L1, L2, L5, and L6/E6 bands. The module has a built-in NIC anti-jamming unit which provides professional-grade interference signal detection and elimination algorithms effectively mitigating multiple narrow-band interference sources and significantly improving signal reception performance in complex electromagnetic environments. Additionally, the embedded algorithms ensure reliable positioning in complex scenarios such as urban environments and deep tree cover.
The LR900-F Telemetry Radio is a small, inexpensive radio with superior performance as a long range Telemetry Radio for the transmission of RTCM3 correction messages between the Rover and the Base Station. The LR900-F transmits in the 915MHz (890-915MHz) range, has an adjustable RF power output of up to 500mW, and uses LoRa modulation technology and frequency hopping spread spectrum to obtain excellent anti-interference performance. Additionally the LR900-F uses transparent transmission to to provide compatibility with any data and protocol.
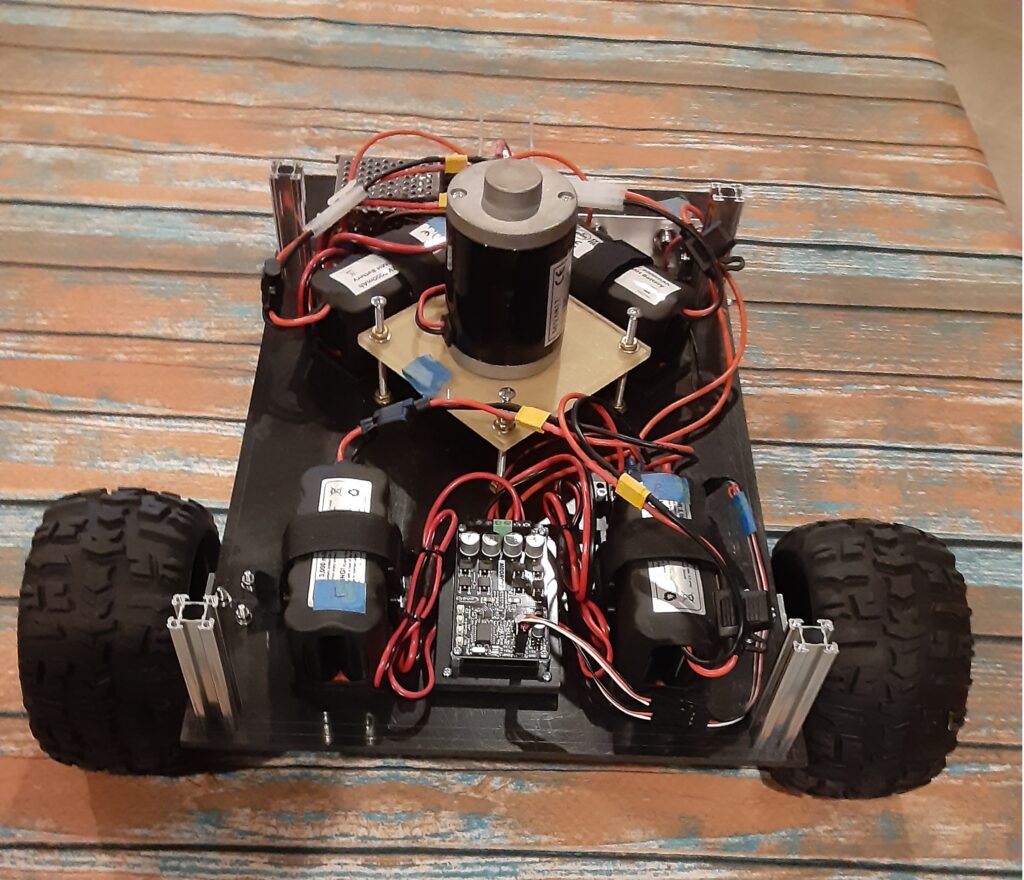
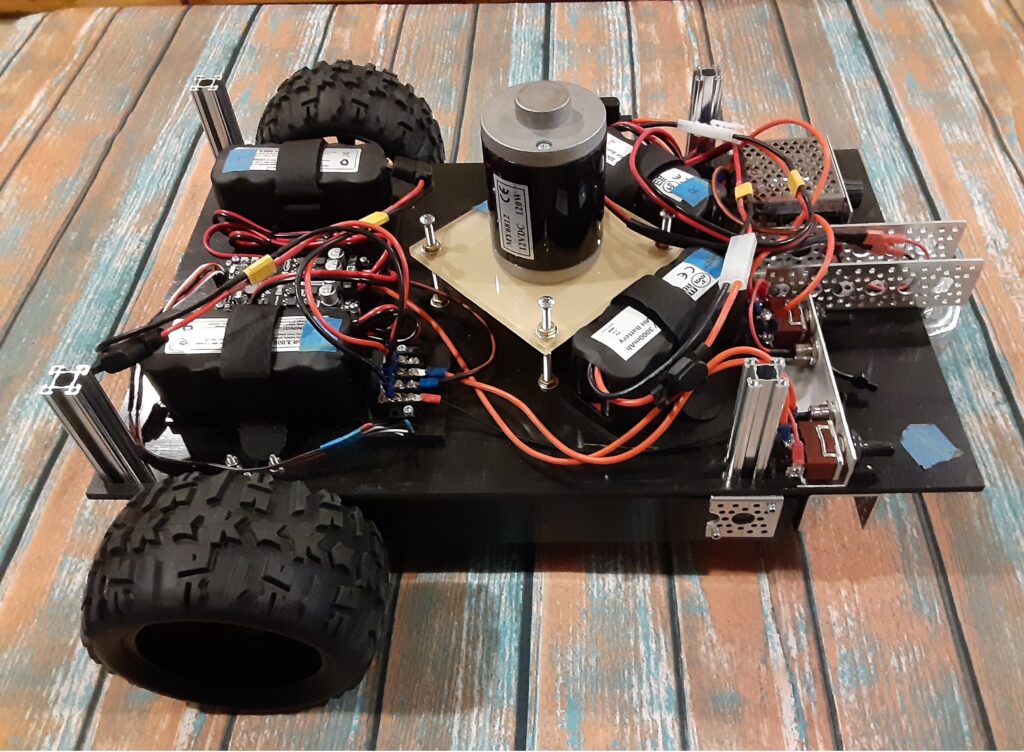
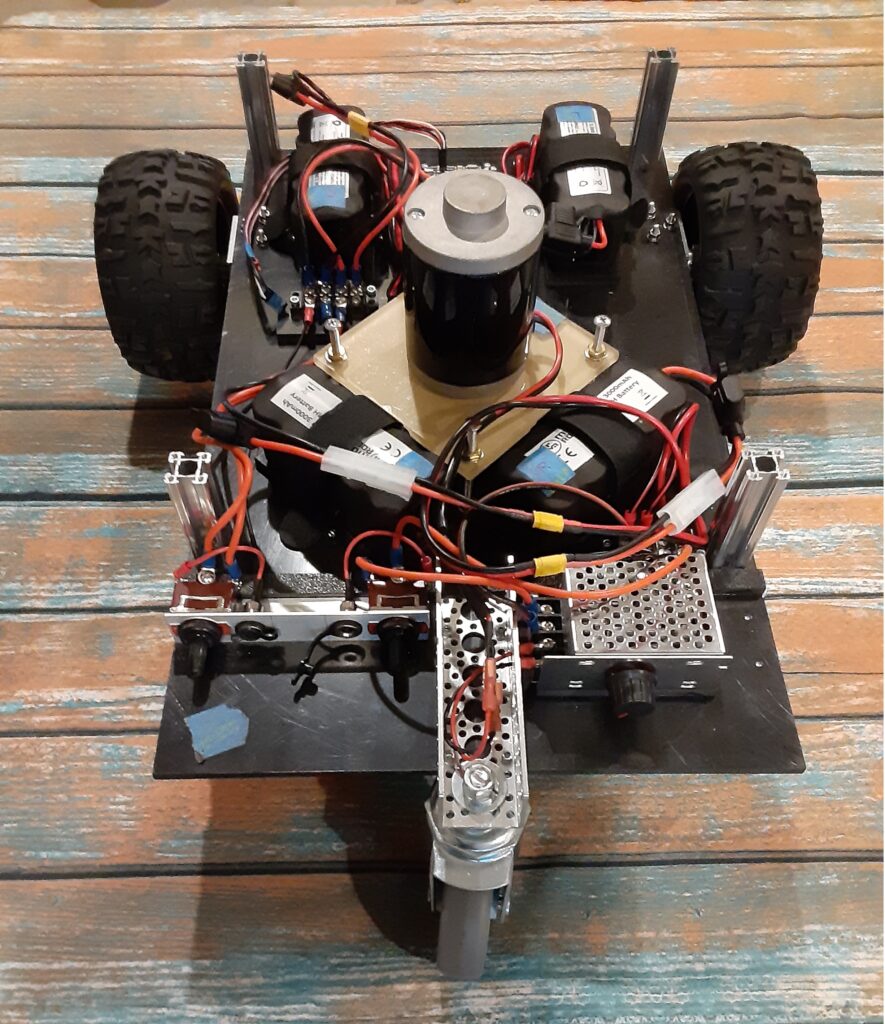
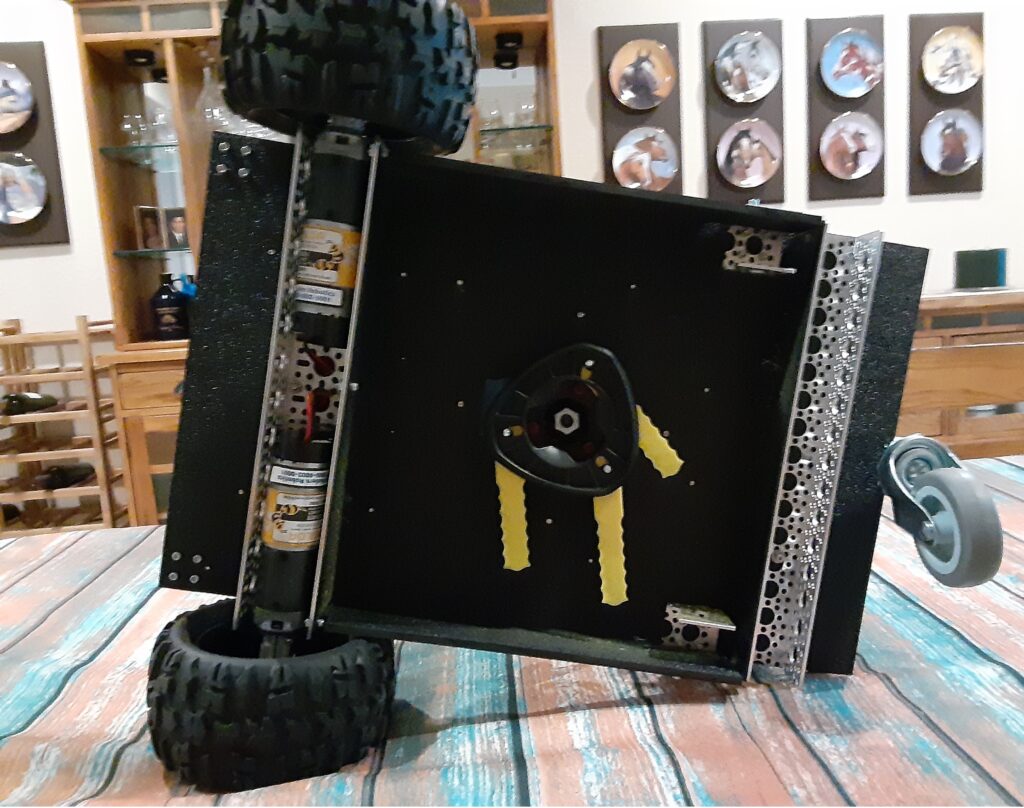
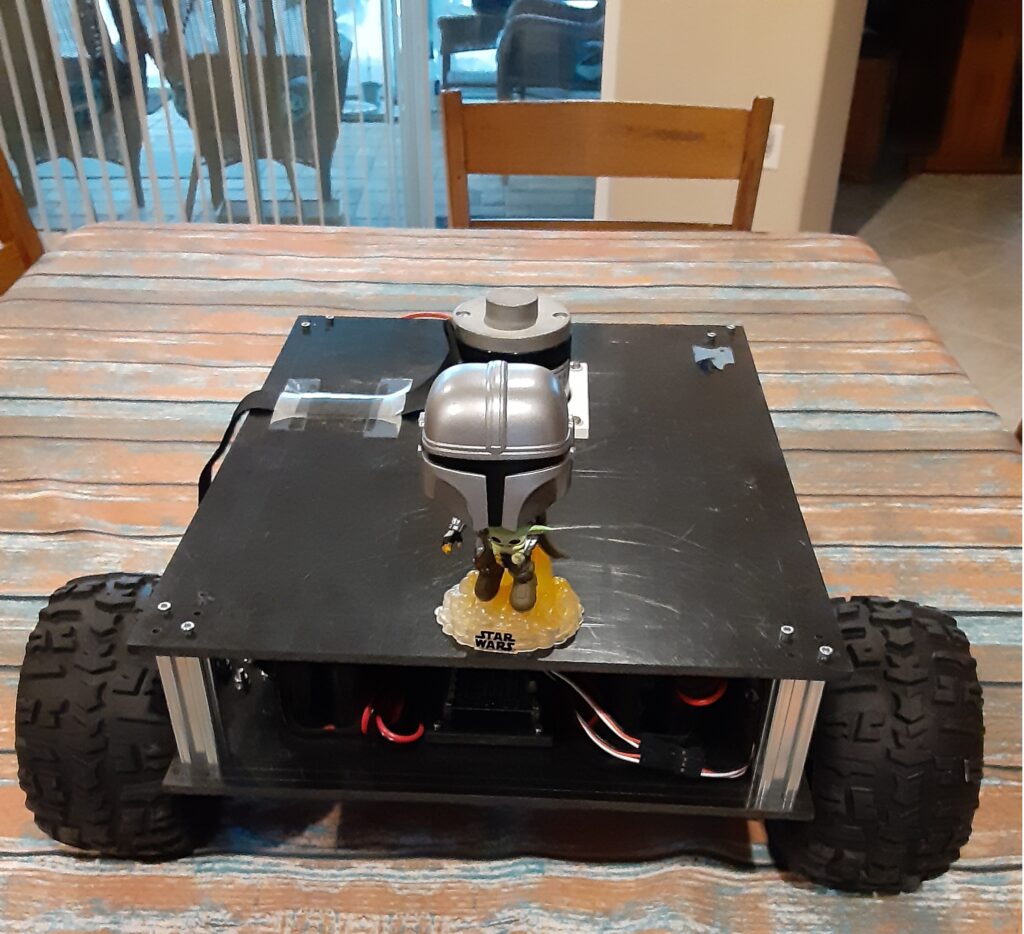
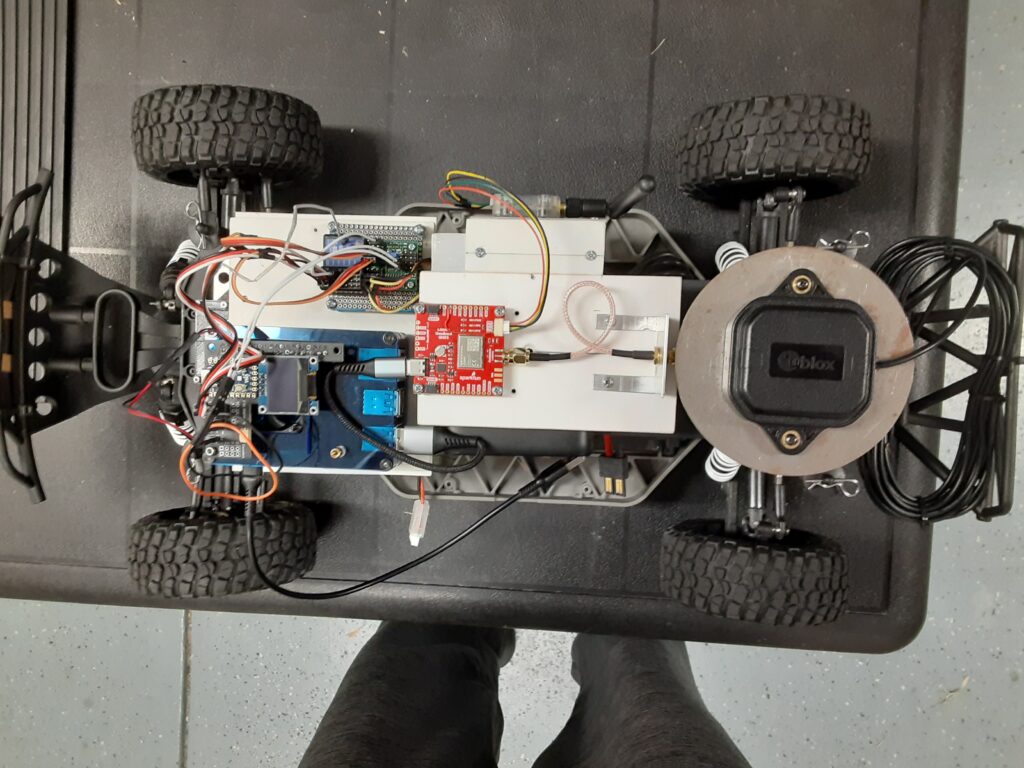
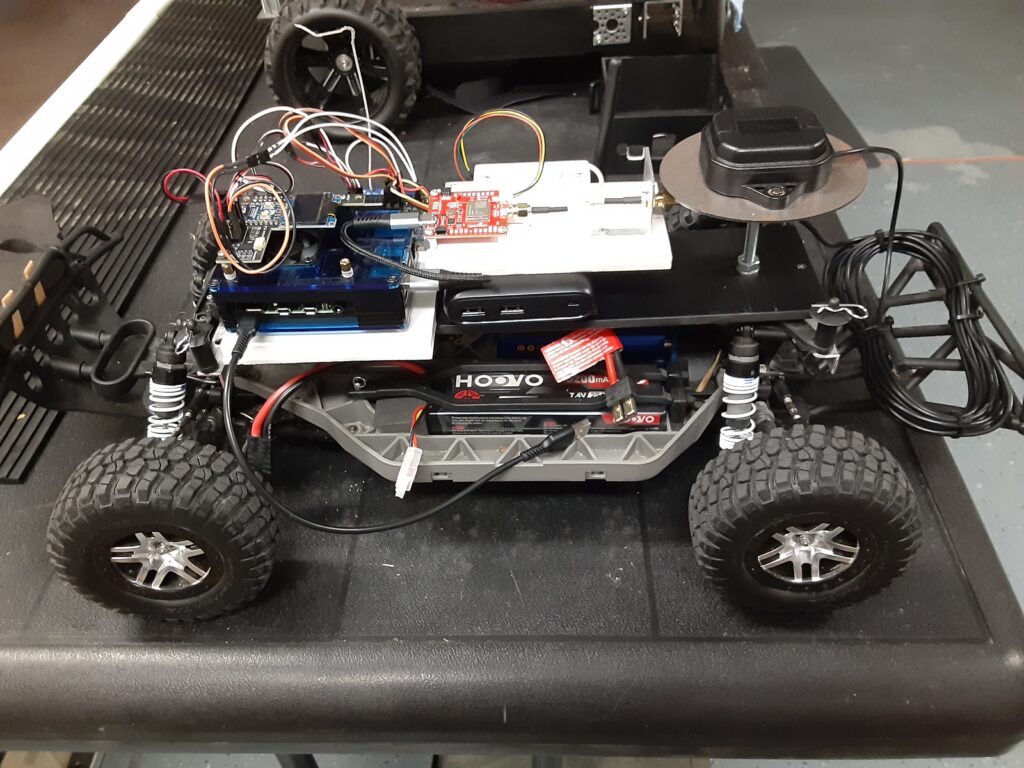
The RC Car Rover Test Vehicle is a Traxxas 1/10 scale Slash Truck chassis that started life as a 2WD BL-2 and was converted to 4WD with a brushless motor/ESC and a 4X4 conversion kit powered by a single 2S 5200mah LiPo battery. The Test Vehicle, for the purpose of this evaluation, also includes a Raspberry Pi 4B+ 4GB SBC, a Donkey Car RC HAT, a u-blox GNSS All-Band High Precision Antenna, a Fly Sky RC Receiver, and an Anker Power Core 13000 Lion battery.
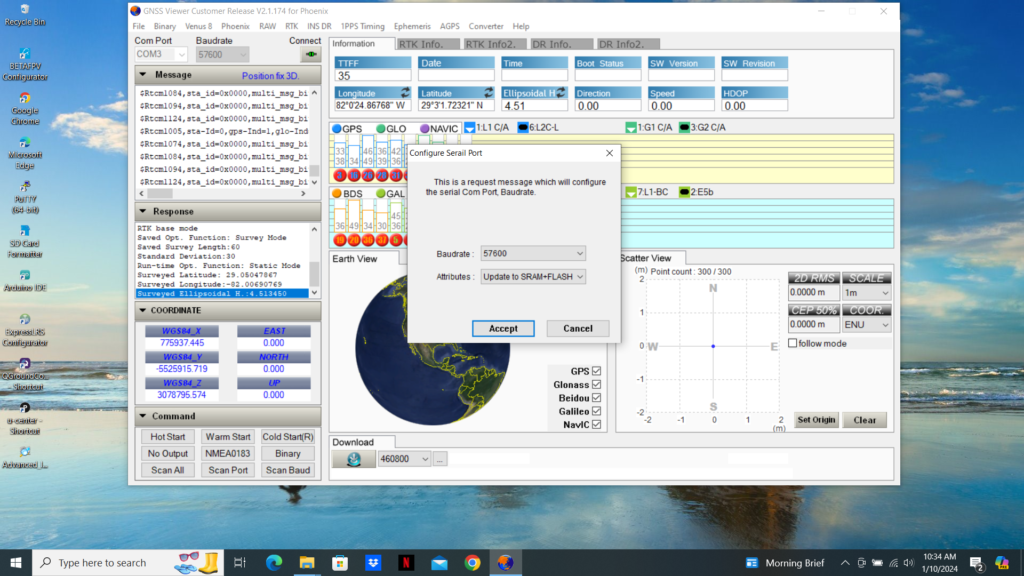
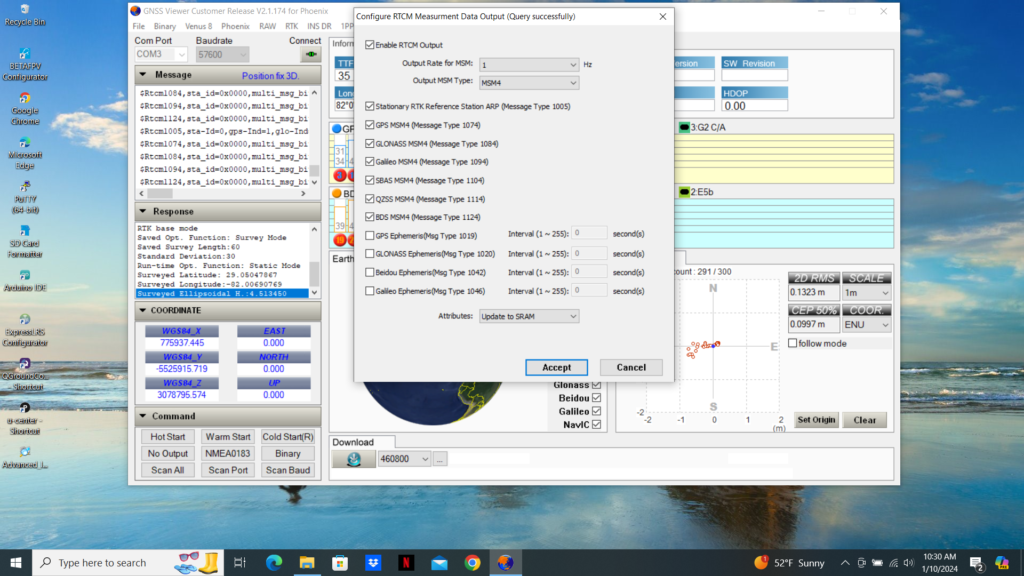
The Preparation. Prior to mounting the Sparkfun Quadband GNSS RTK Breakout Board and the Micoair LR900-F Telemetry Radio on the Slash chassis, I modified the configuration of the LG290P Receiver using the Quectel QGNSS app as follows:
1) Configured UART1 for 115200 baud.
2) Configured UART3 for 57600 baud.
3) Configured the UART1 USB output for only four pertinent NMEA messages.
And modified the Micoair LR900-F LoRa using the Micoair Micoassistant app as follows:
1) Configured the Broadcast Mode for Rx only.
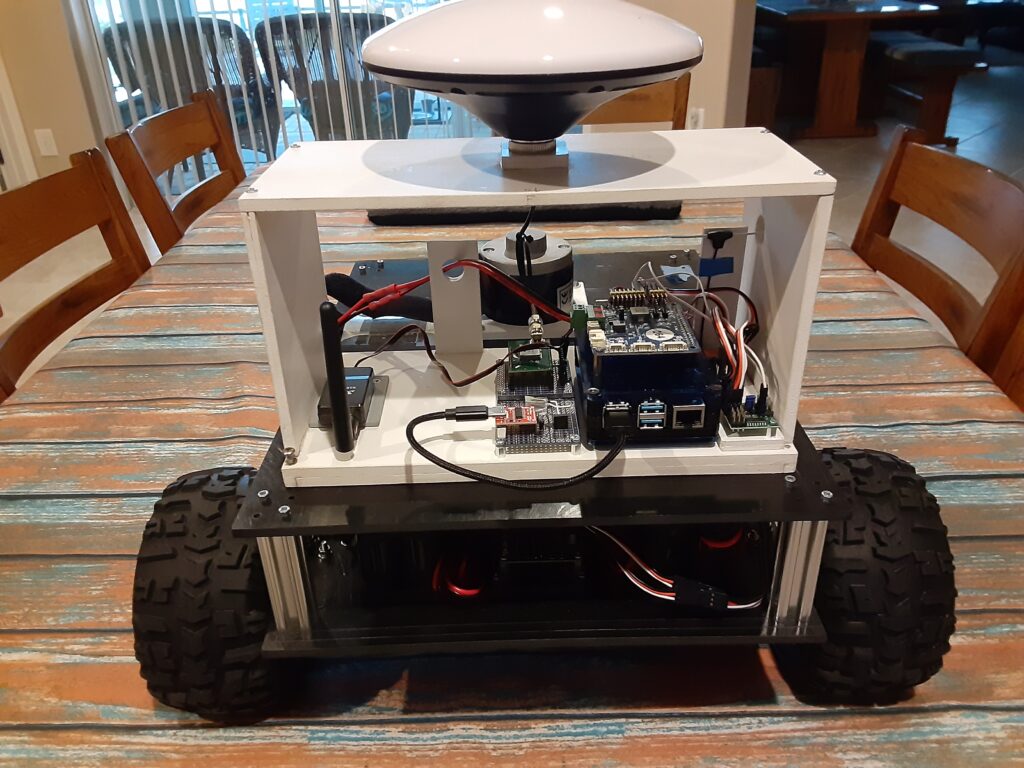
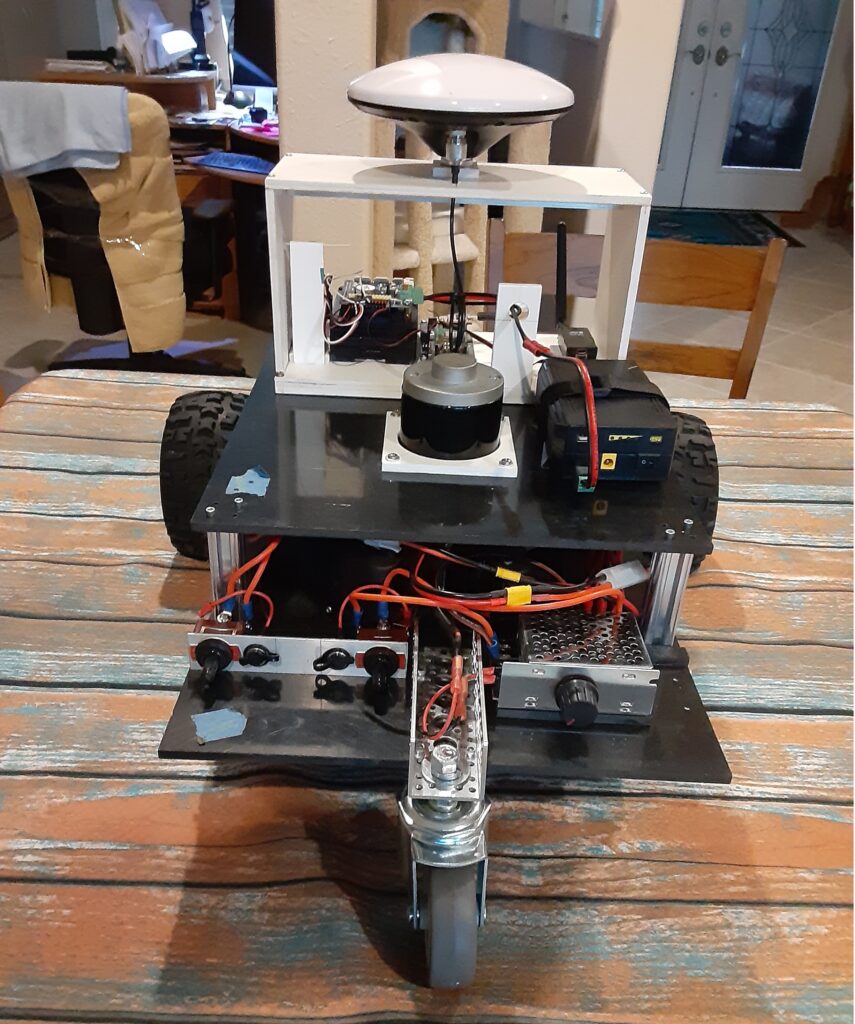
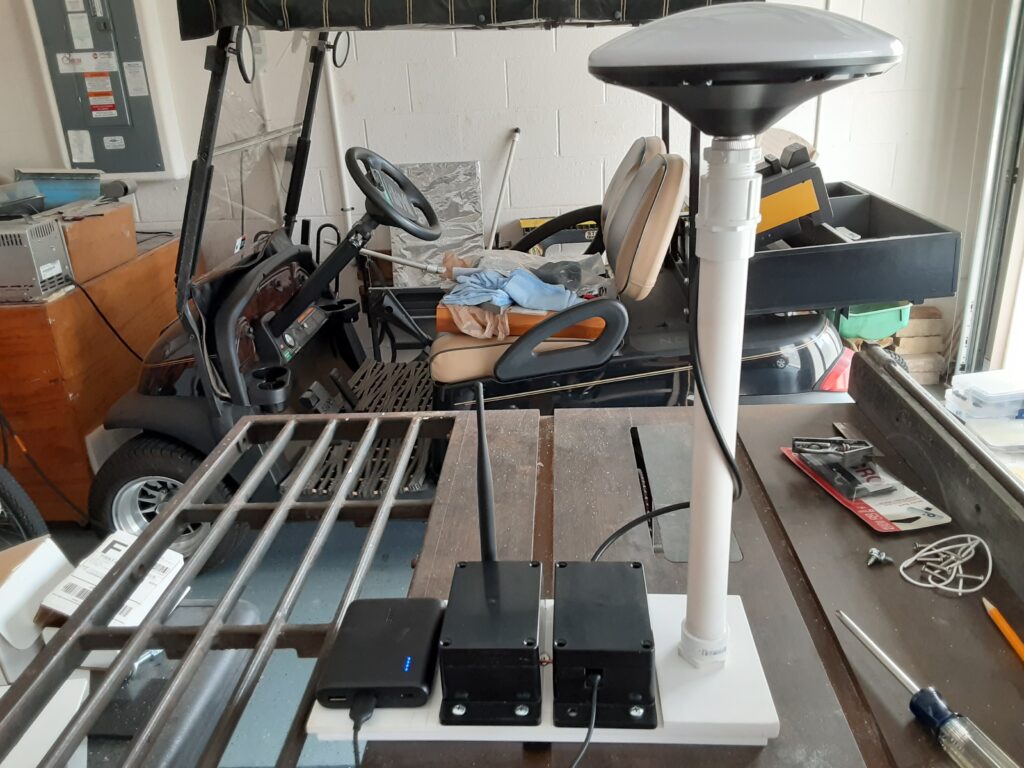
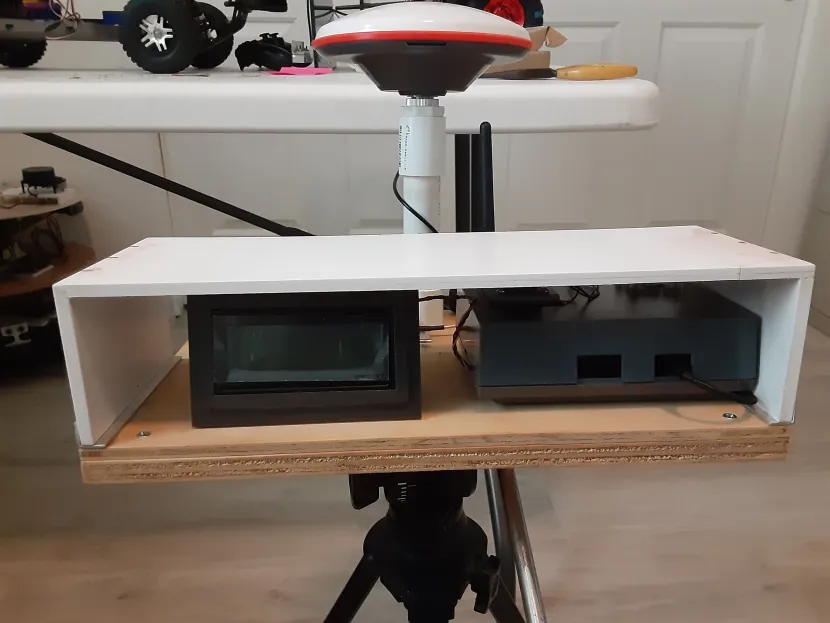
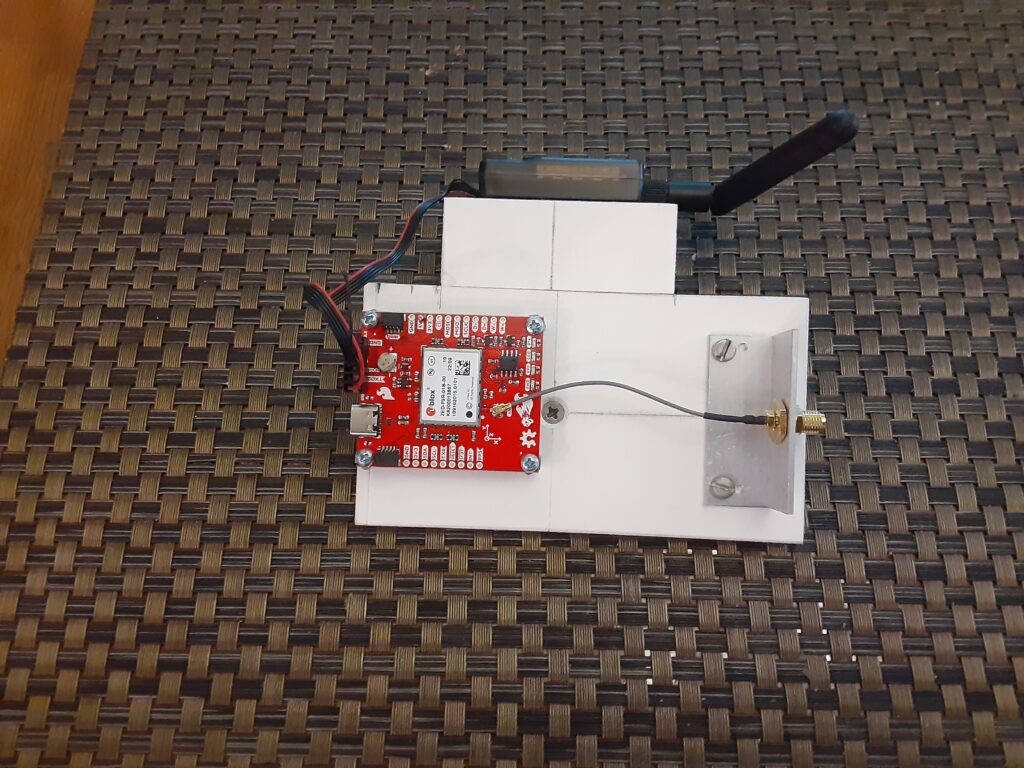
I then mounted the Sparkfun Quadband GNSS RTK Breakout Board and the Micoair LR900-F Telemetry Radio on a sub chassis along with the Raspberry Pi 4B+/RC HAT, the u-blox precision antenna, the RC Receiver and the Anker Power Core 13000 Lion battery as shown in the photos below.
The LR900-F Telemetry Radio is connected over a four wire cable to the UART3 port on the Breakout Board while the u-blox precision antenna is connected to the SMA connector on the Breakout Board. The Sparkfun Quad band GNSS RTK Breakout Board interfaces with the Raspberry 4B+ over a USB connection.
The Evaluation. To begin the evaluation, I setup and powered up my trusty Sparkfun RTK Postcard/Portability Shield Base Station, which includes a Micoair LR900-F Telemetry Radio, in the Broadcast Tx mode for transmission of RTCM3 correction messages to the Rover, in my home’s driveway with a clear view of the sky as my autonomous vehicle test course is the neighborhood street in front of my house. I powered up the Raspberry Pi 4B+ on the Slash Rover along with the ESC and used my HP laptop to SSH into the CLI, running on the Rover’s Raspberry Pi 4B+, and changed to the mycar directory. Then I drove the Rover out into the street in front of my driveway, aligned it with a chalk line starting point as a reference, and verified that the RTK LED on the Receiver Breakout Board was a solid white indicating a RTK Fix solution.
Returning to my laptop I started the path_follow.py program with python manage.py drive on the CLI, opened the Donkey Car webui using Google on the laptop, reset the car origin, hit the start recording button and used the RC transmitter to slowly drive the Rover around my neighborhood street test course collecting GPS latitude and longitude coordinates every 0.2 meters until the Rover arrived back at the chalk line origin starting point. At which time I stopped the course recording and saved the recorded course as donkey_path.csv for course playback.
The Results. Now comes the real test which is to see how well the Rover can autonomously drive the previously recorded course with P and D values based on my previous autonomous Rover experience. Using the Donkey Car webui I reset the Rover’s origin position at the starting line, selected “Full Auto”, and proceeded to watch the Rover move off of the starting line at a moderate speed, as I am using a preset PID speed value, and head straight North up the neighborhood street and make a perfect 180 degree left U turn to the other side of the street. The Rover then headed South back down the street for the next 180 degree left hand U turn at the other end of the Indy style raceway course. After completing the 180 degree left hand U turn at the end of the course, the Rover then continued North on a reasonably perfect beeline path to the start of the course so I let it continue for ten more laps without any issues like going off course and crashing into the curb.
The Conclusions. Compared to my ZED-F9P RTK GNSS Receiver equipped Traxxas E-Maxx Rover, the LG290P RTK GNSS Receiver equipped Traxxas Slash Rover appeared to negotiate the 180 degree left hand U turns with little or no overshoot compared to the E-Maxx Rover and exhibited much less straightaway course hunting than the E-Maxx Rover. However it will be interesting to see how well the E-Maxx Rover performs when equipped with a LG290P RTK GNSS Receiver which will be the subject of my next blog post.
As for the performance of the Micoair LR900-F LoRa Telemetry Radios, I can definitely recommend them as I was able to drive the Slash Rover over a quarter of a mile LOS from the Base Station, with the Base Station Micoair Telemetry Radio set at MIN power output, and not lose the Base Station Telemetry Signal. Since I was running the Base Station Micoair Telemetry Radio at MIN power output, I would say that there is plenty of output power margin for farther LOS distances or challenging urban environments when running the Telemetry Radio at the MID or MAX power output settings.