There’s a lot to like about the Intel OpenBot, which I wrote about last month. Since that post, the Intel team has continued to update the software and I’m hopeful that some of the biggest pain points, especially the clunky training pipeline (which, incredibly, required recompiling the Android app each time) will be addressed with cloud training. [Update 1/22/21: With the 0.2 release, Intel has indeed addressed these issues and now have a web-based way to handle the training data and models, including pushing a new model to the phone without the need for a recompile. Bravo!]
On the hardware side, I could see an easy way to improve upon Intel’s design, which required too much 3D printing and used a ungainly 4 wheel-drive design that was very difficult to turn. There are plenty of very cheap 2WD chassis on Amazon, which use a trailing castor wheel for balance and turning nimbleness. 2WD is cheaper, better, easier and to be honest, Intel should have used it to begin with.
So I modified Intel’s design for that, and this post will show you how you can do the same.
First, buy a 2WD chassis from Amazon. There are loads of them, almost all exactly alike, but here’s the one I got ($12.99)
In the OpenBot hardware instructions, the only things you really need are:
- (If you have a 3D printer, print the phone mount top and bottom. Otherwise see below)
- An Arduino Nano
- An OTG cable
- Wheel odometry sensors
- Motor driver
- Some female-to-male jumper wires
- (suggested) a little breadboard to make the wire connections easier
If you don’t have a 3D printer, you can buy a car phone mount and use that instead.
The only changes you’ll need to make to Intel’s instructions are to drill a few holes in the chassis to mount the phone holder. The plexiglass used in the Amazon kits is brittle, so I suggest cutting a little plywood or anything else you’ve got that’s flat and thin to spread the load of the phone holder a bit wider so as not to crack the plexiglass.
You can see how I used a little plywood to do that below
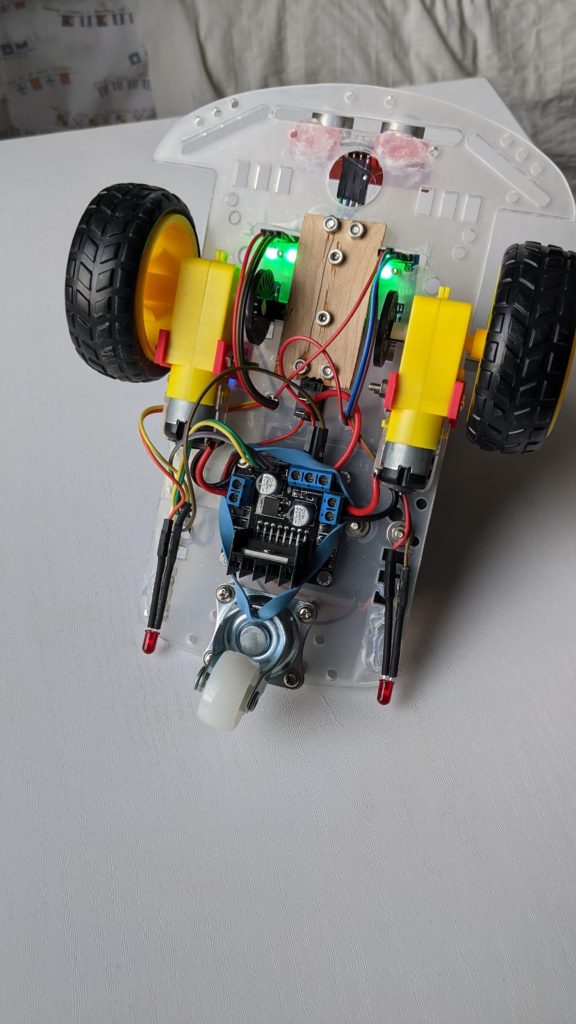
You will also have to expand some of the slots in the plexiglass chassis to fit the encoders. If you have a Dremel tool, use a cutoff wheel for that. If not, carefully use a drill to make a line of holes.
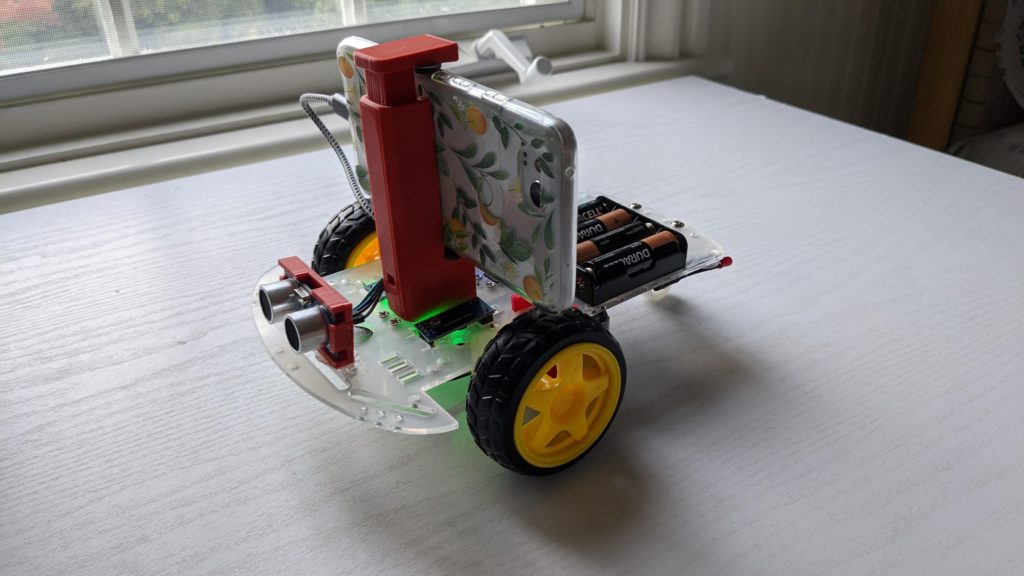
Everything else is as per the Intel instructions — the software works identically. I think the three-wheel bot works a bit better if the castor wheel is “spring-loaded” to return to center, so I drilled in a hole for a screw in the castor base and wrapped a rubber band around it to help snap the wheel back to center as shown above, but this is optional and I’m not sure if it matters all that much. All the other fancy stuff, like the “turn signal” LEDs and the ultrasonic sensor, are also optional (if you want to 3D print a mount for the sonar sensor, this is the one I used and I just hot-glued it on).
I’d recommend putting the Arduino Nano on the small solderless breadboard, which makes adding all jumper wires (especially the ground and V+ ones) so much easier. You can see that below.
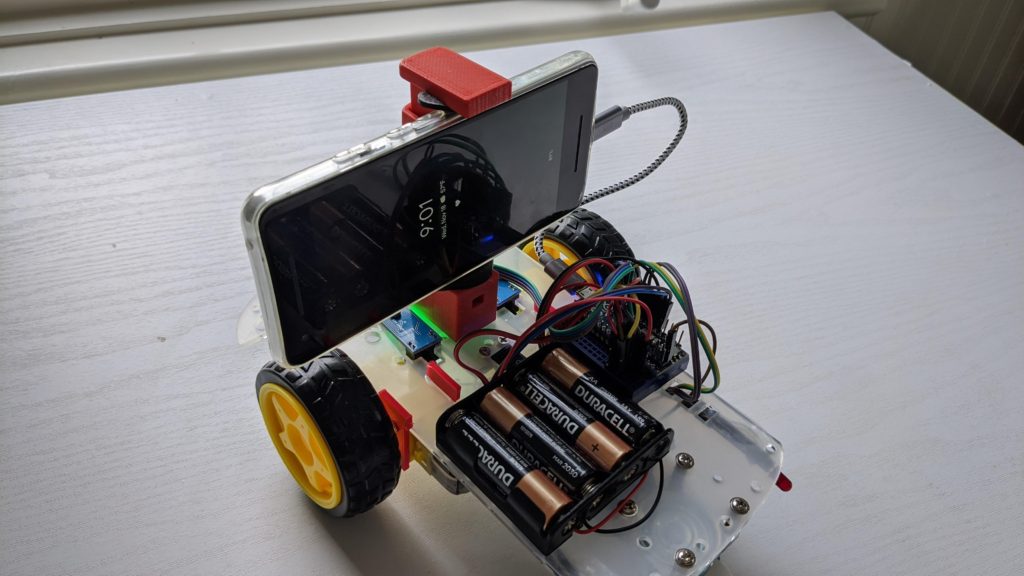
Here it is (below) running in manual mode in our house. The 4 AA batteries work pretty much the same as the more expensive rechargeable ones Intel recommends. But getting rid of two motors is the key — the 2WD is so much more maneuverable than the 4WD version and just as fast! Honestly, I think it’s better all around — cheaper, easier and more nimble. OpenBot with 2WD chassis – YouTube
WHAT IS THE CIRCUIT DIAGRAM CAN U SEND IT
Well, I’m looking for the same answer. Thanks if you make it clear that how we connect Arduino to the phone.
How do you connect Arduino to the Smart phone?
Please share a link to a diagram, set of instructions and / or a video tutorial if possible.