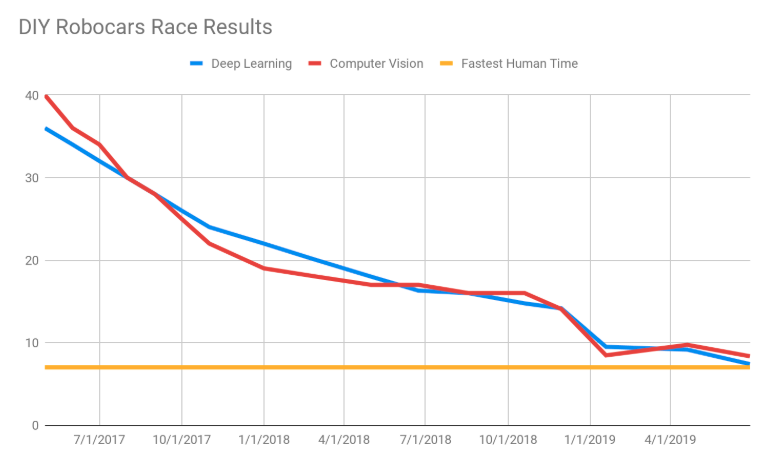
As you know, the DIY Robocars races are partly about beating other cars, but they’re also about beating puny humans. And we’re getting pretty close!
But see that yellow line at the bottom representing the “fastest human time”? That time was set almost a year ago by a human who…let’s put this gently…may not have been the fastest RC driver on the planet. Or possibly even in the room.
So now it’s time to give the humans a chance to defend themselves better before those red and blue lines cross the yellow and our species is rendered unnecessary.
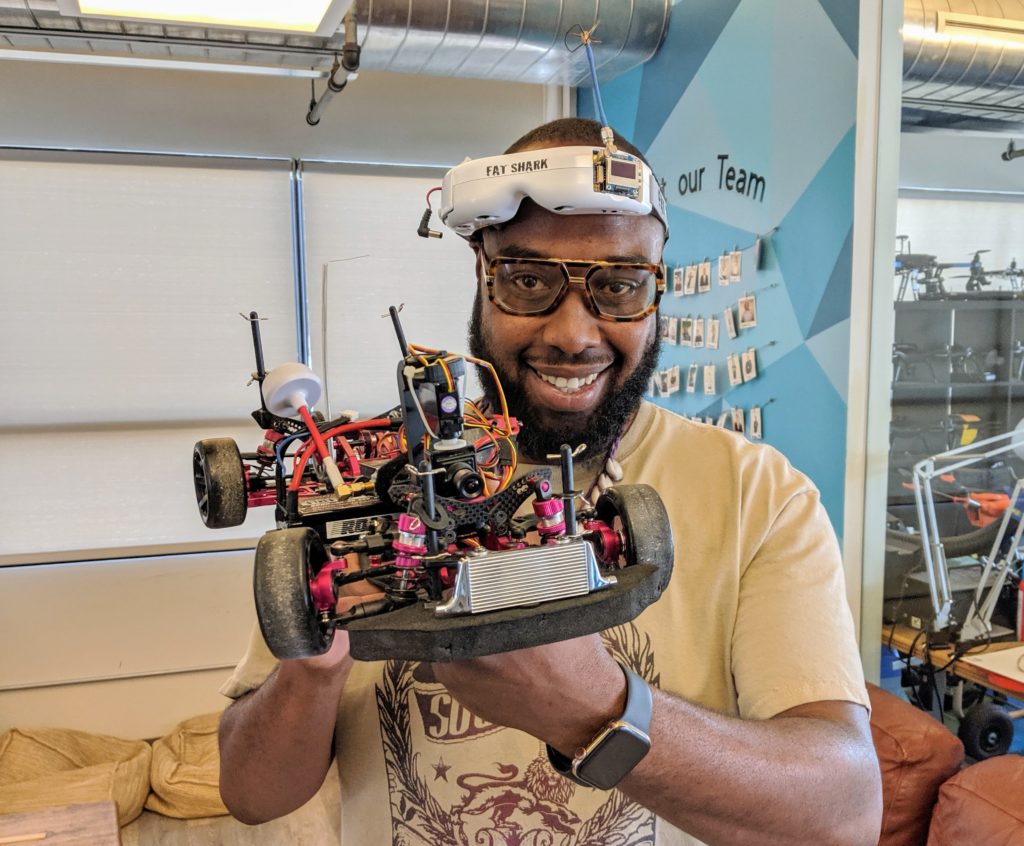
Enter Ross Robinson (above)! By day he’s a robot wrangler at 3DR (as am I), but unlike the rest of us geeks, he’s pretty good at driving a car. And he not only has a fast one, but it’s set up with a camera for First Person View driving, so his view of the track will be exactly the same as the autonomous cars!
So, starting with the Sept 21st event, the last race of the day will be the fastest robot car vs the fastest human present. The first one will be Ross.
No pressure, Ross, but the fate of humanity lies in your hands
Along with the fantastic $99 Jetson Nano, Nvidia has released two DIY car kit guides to use the Nano for real-world robotics. I’ve built and got them both working, so this is a quick overview of the two and some tips and tricks. (There’s also a good hands-on of the Jetbot at ExtremeTech, which is worth reading, too)
The Jetbot is designed to use computer vision and AI to navigate small areas slowly, such as the Lego-scale roads shown here, to demonstrate basic self-driving car techniques.
The parts are available in various options:
Order them all separately from this list (about $150)
Kit from Adafruit ($34.95, requires a Jetson Nano, the 3D printed parts, camera, wifi, battery and a few other parts from the list above)
Just the 3D printed parts ($35), if you don’t have your own 3D printer
Sparkfun is also planning their own kit ($274), which looks a little too cobbled together for my taste, so that wouldn’t be my first choice
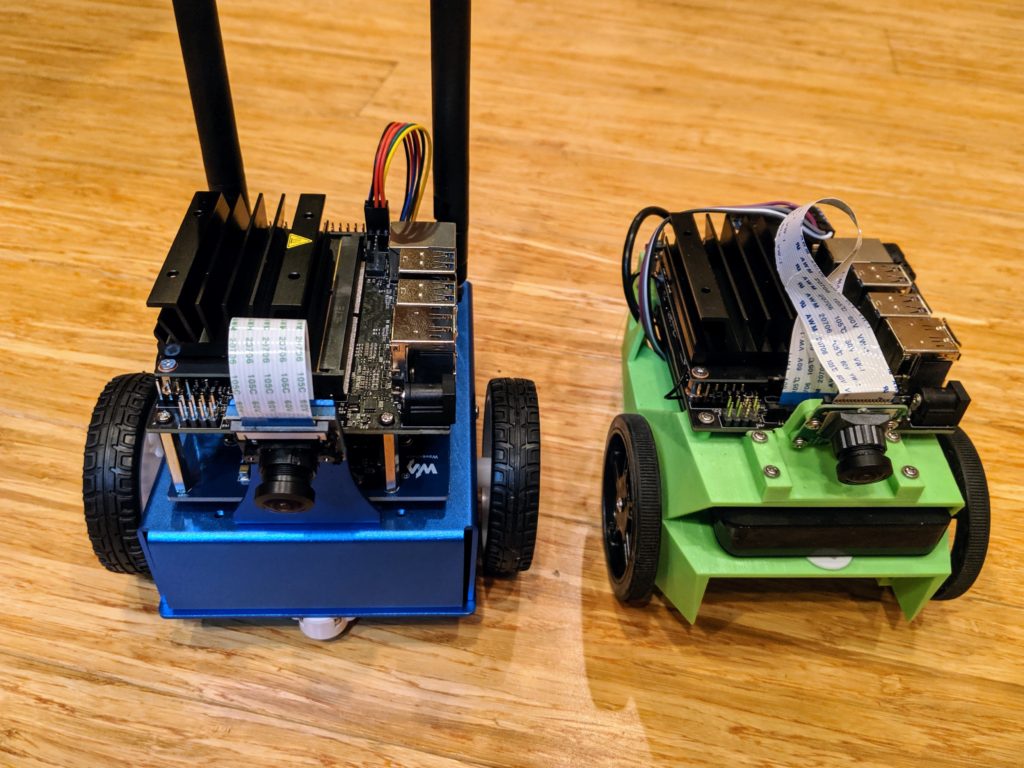
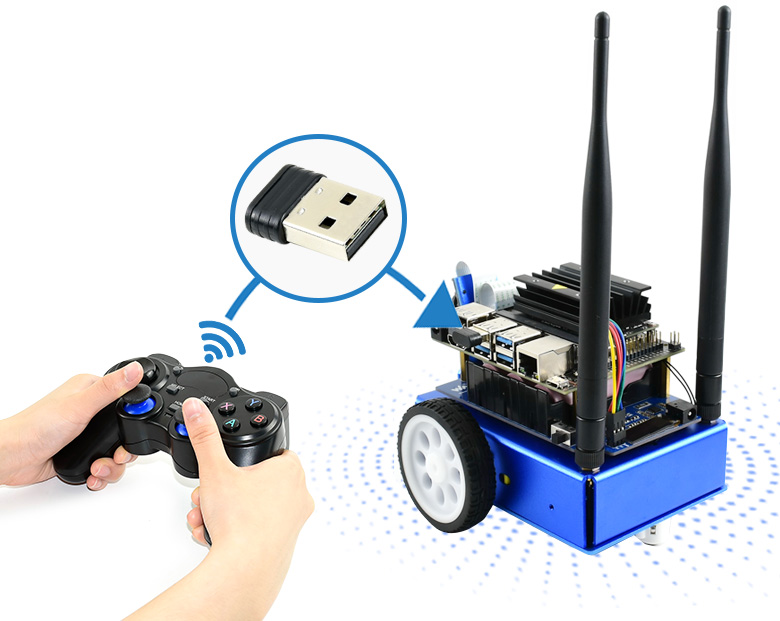
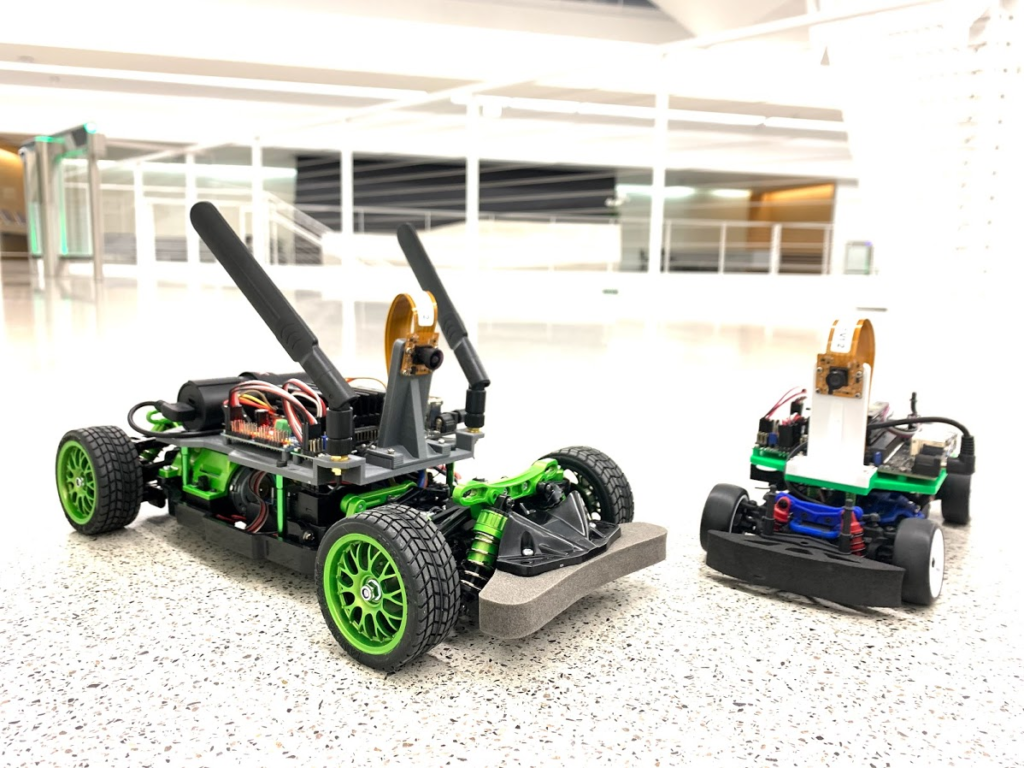
Waveshare also has its own 3rd-party variations of the Jetbot, which improves on the original with a metal chassis and integrated electronics (see below). This seem to be the best deal, at $219 INCLUDING a Jetson nano, but I haven’t tried it myself. Update: now I have and it’s terrific. Short review here, but here’s it next to my DIY version:
However, the Nvidia team has tried it and they like it a lot, especially with its integrated battery charging, so that seems like the best bet if you don’t want to get and make the parts yourself.
What can it do?
The basic examples are collision avoidance and object following, both of which use the Nano’s deep learning abilities and Jupyter Python interface for training well. Here’s one example of it working:
A new example, which you’ll find on the on-board Jupyter notebooks but not the wiki yet, is road following. I trained it on my patio track, which is meant for larger vehicles that can roll over the tile bumps, but despite what must have seemed like pretty rough terrain for this little bot, it made it around the track pretty well:
More to the point, this is a general purpose AI platform. Anything that can run on a Jetson can run on this (within the limits of the Nano’s processing power): TensorFlow, Keras, OpenCV, etc. It’s running a flavor of Ubuntu Linux, so DonkeyCar works, and you can even train locally (as opposed to in the cloud)! The only limits are the small and slow car…
…Enter JetRacer!
JetRacer is more than just JetBot on a faster RC chassis. The Nvidia team also increased the speed of the software processes, including increasing the camera frame rate and optimizing TensorRT to handle the speed of the vehicle.
It’s also got a simplified training scheme to gather data faster. Like JetBot, it uses “supervised learning”, which is to say that you, as the human, put the car on the track and point to where it should drive in various different positions. You do that about 50 times, train for 5 minutes, and then it can drive itself. On JetBot, this involves using a joystick to point to a path. On JetRacer, you just click on the spot it should drive to (no joystick required).
Now, you’ve got a vehicle that can compete in a DIY Robocars race. This isn’t a good example of a proper track (my patio isn’t big enough) but it will give you a sense of how it compares to JetBot, above:
Here it is training on the beginners track at the proper DIY Robocars track at CircuitLaunch:
The standard JetRacer chassis is a 1/18th-scale Latrax model, which has a 7″ wheelbase. That’s plenty fast for me (and it qualifies for the “Stock” DIY Robocars category), but if you want to go even faster, they support a 1/10th scale version based on the Tamya chassis, which I think can compete with the fastest cars we have.
A final note on the Jupyter notebooks Nvidia supplies for road training. They’re good, but confusing. The process goes like this:
Gather data by recording 50 images or so, with human suggestions on where to steer for each
Train with those images
Check your trained model with some live video from the car on the track, to see if the blue dot (“steering target”) is pointing to the right place to drive to
Run it live on the car, tuning various parameters for the best performance
Right now, those four steps are combined into two Jupyter notebooks, which is both confusing and tends to bog each down with unnecessary processes running in the background. My advice to the Nividia team would be to split them up a bit more. #1 above should be one notebook. #3 should be another, and #4 should also be a stand-alone, with interactive sliders that work in real-time to adjust driving parameters, exactly as JetBot does.
So, in summary, JetBot is easy to use but slow. JetRacer is fast, but hard to use. Memo to Nvida: Combine the best of the two and you’ll have a winner!
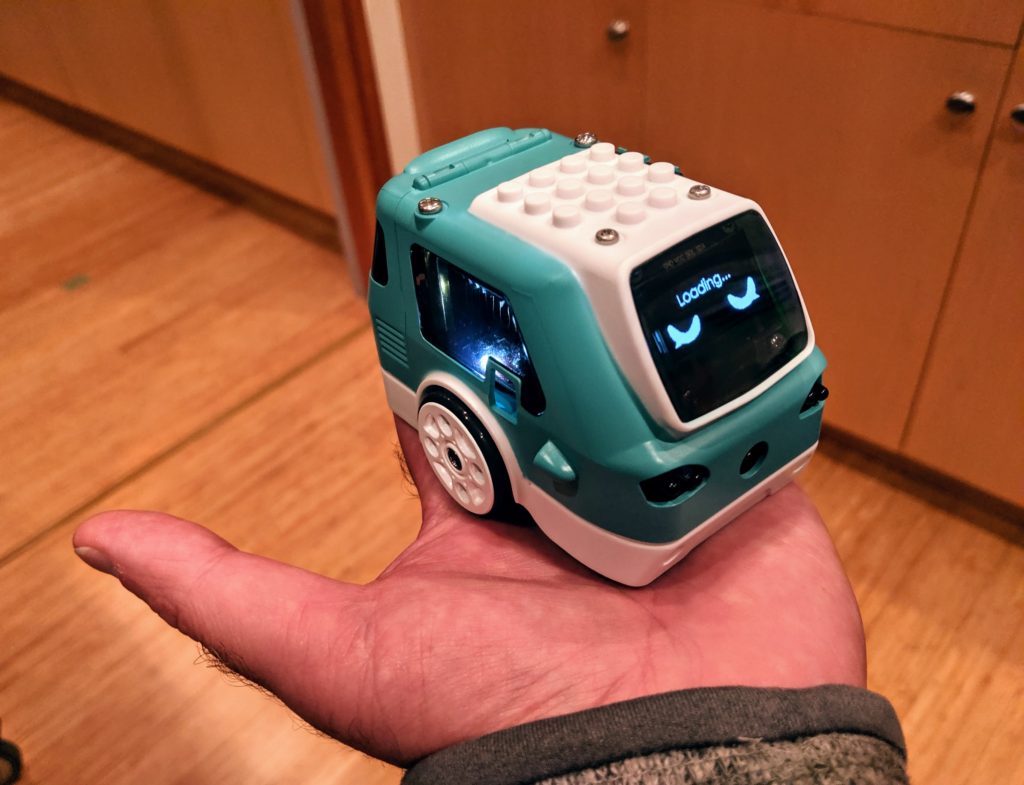
First of all, it’s ADORABLE! So small, it can fit in the palm of your hand, but has a RaspberryPi ZeroW, and Arduino, a screen, camera, loads of sensors and LEDs all inside.
Zumi started as a Kickstarter project and just shipped to first backers (I was one) last week. You can now buy it directly from its creators, Robolink, for $139. Details are here.
My first impressions were very positive, despite the usual first-batch problems with Kickstarter projects (a few missing bits in the kit and some instructions that aren’t quite accurate). It was easy to put together and once I fixed a boneheaded mistake (if you plug in the screen connector backwards, the car won’t boot at all — yikes), it booted up fine and coached me through the process of connecting via wifi and updating its firmware.
So what can it do? The initial Kickstarter pitch focused a lot on computer vision and AI, but it’s clear that many of those videos were done on beefier computers than the RaspberryPi Zero in Zumi. The current package is more limited, with no real machine learning at all.
Nevertheless, the initial lessons are a lot of fun and show the solid Python functions Robolink has shipped with Zumi. Examples start with how to use a Jupyter notebook, and then move to sensors (IR distance/obstacle, gyro and accelerometer), LEDs and the buzzer and of course motion. Although Zumi’s motors don’t have encoders, it uses the gyro to go straight and turn by set amounts, which works well.
Once you get to computer vision, the limits of the RaspberryPi Zero, hobbled by the overhead of the Jupyter server and wifi streaming, show up. Lessons in object tracking, face and smile spotting and color spotting all suffer from terrible lag and several can not finish at all.
Although Robolink promises more is coming with updates, it’s hard to see how they can squeeze much more about RPi Zero using Jupyter. Although Jupyter is a great way to combine documentation, code and graphical output on one screen, it’s really designed to run on faster computers and slows to a crawl on Zumi if the camera is used. Robolink intends to release a different IDE in the future, perhaps one more like their Blockly interface, and that may work faster.
Once Robolink fixes the performance issues (perhaps by switching out Jupyter for a faster IDE) I think computer vision, including lane following and object detection, should be doable. Basic machine learning (with models trained in the cloud and only run locally) should also be possible. And who knows — maybe the Rasperry Pi Foundation will release a faster RPZero someday?
But for now, Zumi is really nicely designed and super-cute robot car at a reasonable price with a lot of room to grow.