First impressions of Tinkergen MARK robocar

tl;dr: The Tinkergen MARK ($199) is my new favorite starter robocar. It’s got everything — computer vision, deep learning, sensors — and a great IDE and set of guides that make it all easy and fun.

Getting a robocar design for first-time users right is a tricky balance. It should be like a great videogame — easy to pick up, but challenging to master. Too many kits get it wrong one way or another. They’re either too basic and only do Arduino-level stuff like line-following or obstacle avoidance with a sonar sensor, or they’re too complex and require all sorts of toolchain setups and training to do anything useful at all.

In this post, I list three that do it best — Zumi, MARK, and the Waveshare Piracer. Of those, the Piracer is really meant for more advanced users who want to race outdoors and are comfortable with Python and Linux command lines — it really only makes the hardware side of the equation easier than a fully DIY setup. Zumi is adorable but limited to the Jupyter programming environment running via a webserver on its own RaspberryPi Zero, which can be a little intimidating (and slow).

But the Tinkergen MARK gets the balance just right. Like the others, it comes as a very easy to assemble kit (it takes about 20 minutes to screw the various parts together and plug in the wires). Like Zumi, it starts with simple motion control, obstacle detection and line following, but it also as some more advanced functions like a two-axis gimbal for its camera and the ability to control other actuators. It also has a built-in screen on the back so you can see what the camera is seeing, with an overlay of how the computer vision is interpreting the scene.

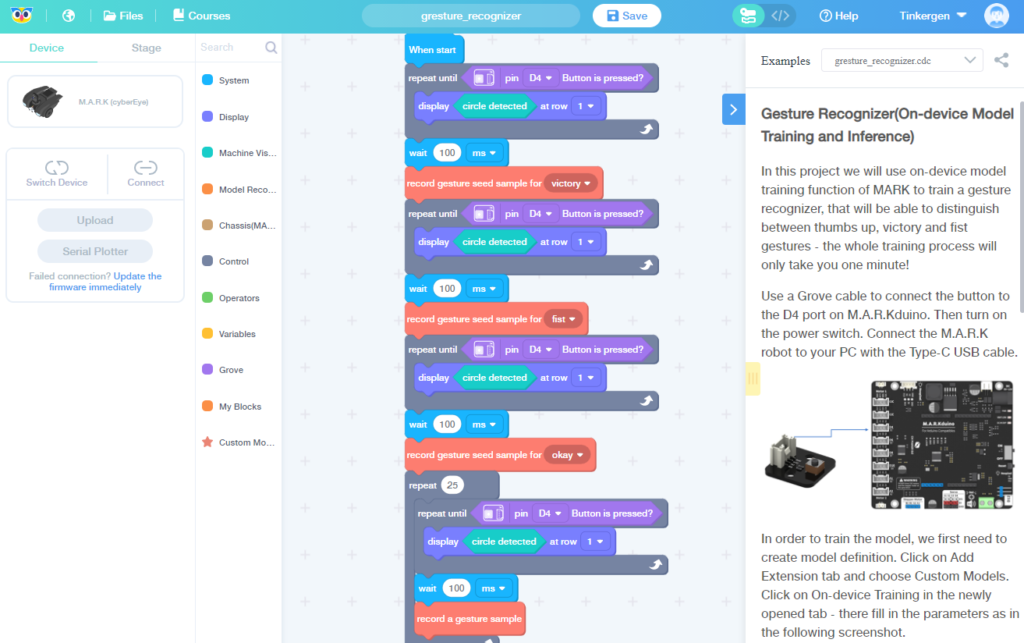
Where MARK really shines is the learning curve from basic motion to proper computer vision and machine learning. This is thanks to its web-based IDE and tutorial environment.

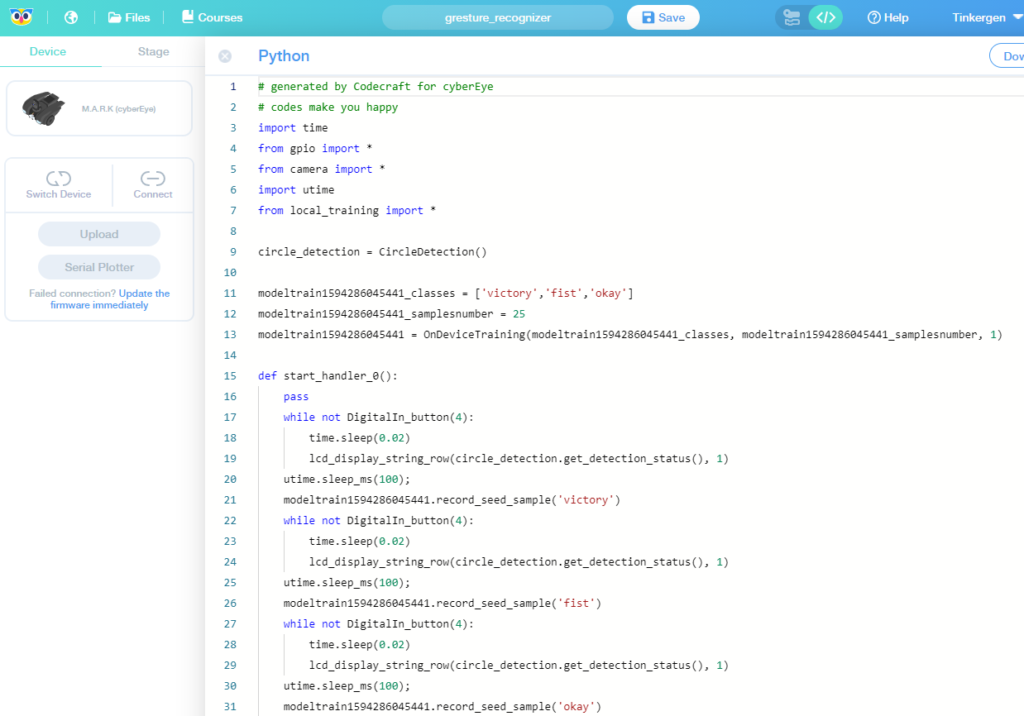
Like a lot of other educational robotics kits designed for students, it defaults to a visual programming environment that looks like Scratch, although you can click an icon at the top and it switches to Python.

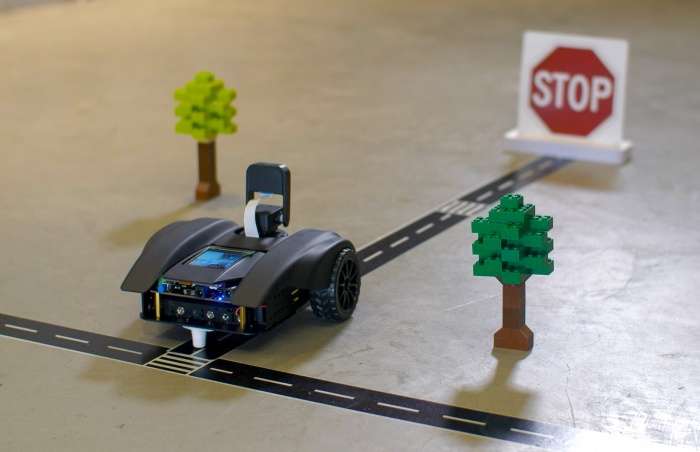
Videos and guides are integrated into the web interface and there are a series of courses that you can run through at your own pace. There is a full autonomous driving course that starts with simple lane-keeping and goes all the way to traffic signs and navigation in a city-street like environement.

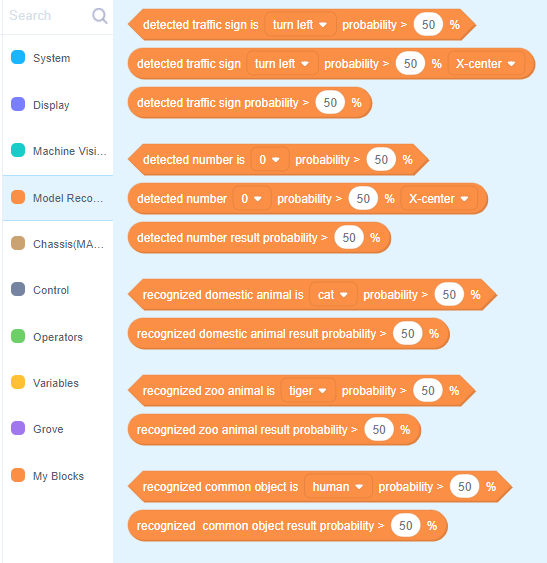
Where MARK really shines is in the number of built-in computer vision and deep learning functions. Pre-trained networks include recognizing traffic signs, numbers, animals and other common objects:

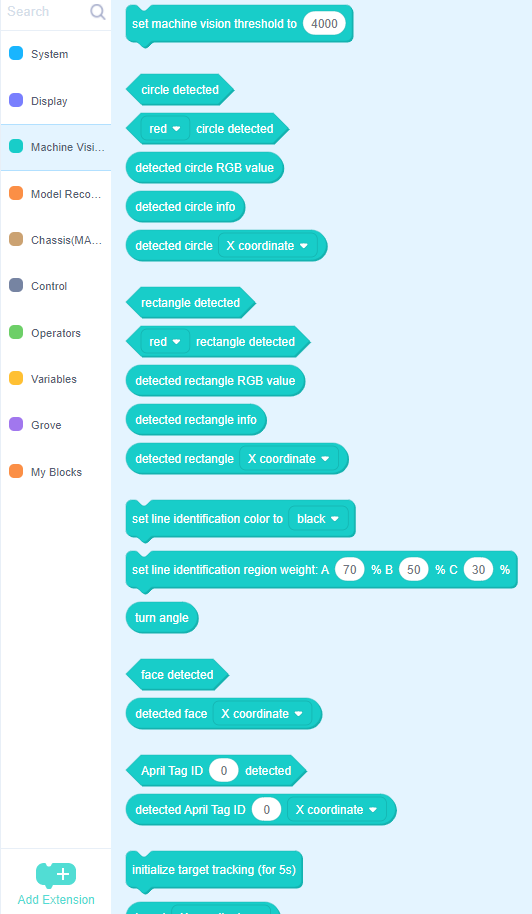
Built-in computer vision modules include shapes, colors, lines, faces, Apriltags and targets. Also supported is both visual line following (using the camera) or sensor line following using the IR emitter/receiver pairs on the bottom of the car.

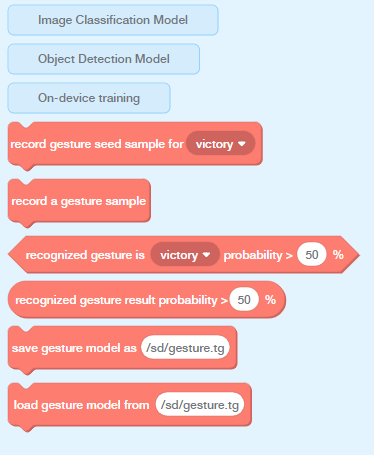
In addition, you can can train it to identify new objects and gestures by recording images on the device and then training a deep learning network on your PC, or even training on the MARK itself for simpler objects.

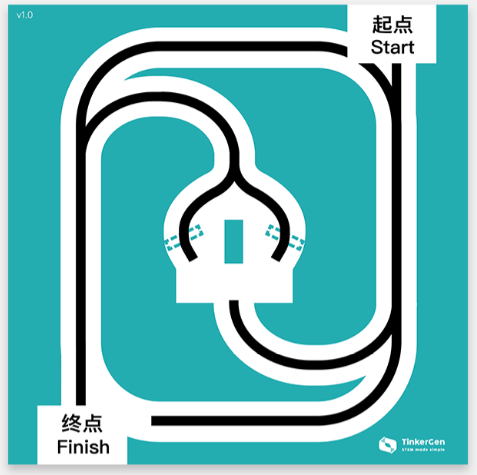
I got the track mat as well with the kit, which is the right size and contrast to dial in your code so it performs well. Recommended.

In short, this is the best robocar kit I’ve tried — it’s got very polished hardware and software, a surprisingly powerful set of features and great tutorials. Plus it looks great and is fun to use, in large part due to the screen at the top that shows you what the car is seeing. A great Holiday present for kids and adults alike — you won’t find a better computer vision and machine learning experimentation package easier to use than this.

First impressions of the Intel OpenBot

Intel has released an open source robocar called OpenBot that uses any Android phone running deep-learning code to do autonomous driving, including navigating in halls or on a track or following a person. The key bit here is the open source Intel Android app, which does all the hard work; the rest of the car is just a basic Arduino and standard motors+chassis.

To be honest, I had not realized that it was so easy to get an Android phone to talk to an Arduino — it turns out that all you need is an OTG (USB Type C to USB Micro or Mini) cable for them to talk serial with each other. (This is the one I used for Arduinos that have a USB Micro connector.) Sadly this is not possible with iOS, because Apple restricts hardware access to the phone/tablet unless you have a special licence/key that is only given out to approved hardware.

The custom Intel chassis design is very neat, but it does require a lot of 3D printing (a few days’ worth). I don’t really understand why they didn’t just use a standard kit that you can buy on Amazon instead and just have the user 3D print or otherwise make or buy a phone holder, since everything else is totally off the shelf. Given how standard the chassis parts are, it would be cheaper and easier to use a standard kit.

I ended up using a chassis I had already, which is the DFRobot Cherokey car. It’s slightly overkill, since it has all sorts of wireless communications options built in, including bluetooth and and Xbee socket, that I didn’t need, but it’s just evidence that you can use pretty much any “differential drive” (steering is done by running motors on the left and right at different speeds) chassis you have handy. Basically any car that uses an Arduino will work with a little tweaking.

I took a few other liberties. I had some motors that had built-in quadrature encoders, which I prefer to the cheap optical encoders Intel recommended, so I had to modify the code a bit for them and that meant changing a few pin mappings. (You can see my modified code here.). But otherwise it’s pretty much as Intel intended, complete with sonar sensor and cute turn signals at the back.

So how does it work? Well, for the easy stuff, great. It does person following right out of the box, so that’s a good test if your bot is working right. But the point is to do some training of your own. For that, Intel has you drive manually with a bluetooth game controller, such as a PS4 controller, to gather data for training on your laptop/PC. That’s what I did, although Intel doesn’t tell you how to pair the controller with your Android phone ( (updated) the answer: press the controller PS and the Share button until the light starts flashing blue fast. Then you you should be able to see it in your Android Bluetooth settings “pair new device” list. More details here).

But for the real AI stuff, which is learning and training new behavior, it’s still pretty clunky. Like DonkeyCar, it uses “behavioral cloning”, which is to say that the process is to drive it manually around a course with the PS4 controller, logging all the data (camera and controller inputs) on your phone, then transfer a big zip file of that data to your PC, which you run a Jupyter notebook inside a Conda environment that uses TensorFlow to train a network on that data. Then you have to replace one of the files in the Android app source code with this new model and recompile the Android app around that. After that, it should be able to autonomously drive around that same course the way you did.

Two problems with this: first, I couldn’t get the Jupyter notebook to work properly on my data and experienced a whole host a problems, some of which were my fault and some were bugs in the code. The good news is that the Intel team is very responsive to issue reports on Github and I’m sure we’ll get those sorted out, ideally leading to code improvements that will spare later users these pain points. But overall, the data gathering and training process is still way too clunky and prone to errors, which reflects the early beta nature of the project.

Second, it’s crazy that I have to recompile the Android app every time I train a new environment. We don’t need to do that with DonkeyCar, and we shouldn’t have to do that with OpenBot, either. Like DonkeyCar, the OpenBot app should be able to select and load any pretrained model. It already allows you to select from three (person following and autopilot) out of the box, so it’s clearly set up for that. So I’m confused why I can’t just copy a new model to a directory on my phone and select that from within the app, rather than recompiling the whole app.

Perhaps I’m missing something, but until I can get the Jupyter notebook to work it will just have to be a head-scratcher…