The difference between proper RC cars and toys (when you’re turning them into robots)

What kind of car should you make autonomous? They all look the same! There are some amazing deals out there! How to choose??

I’m going to make it easy for you. Look for this:

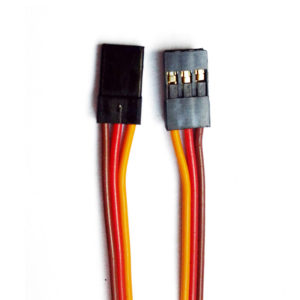
What’s that? It’s a standard RC connector, which will allow you to connect steering and throttle to standard computer board (RaspberryPi, Arduino, etc).  If you see that in car, it’s easily converted into autonomy. (Here’s a list of cars that will work great)

If you don’t see that, what you’ve got is CRAZY TOY STUFF. Don’t buy it!

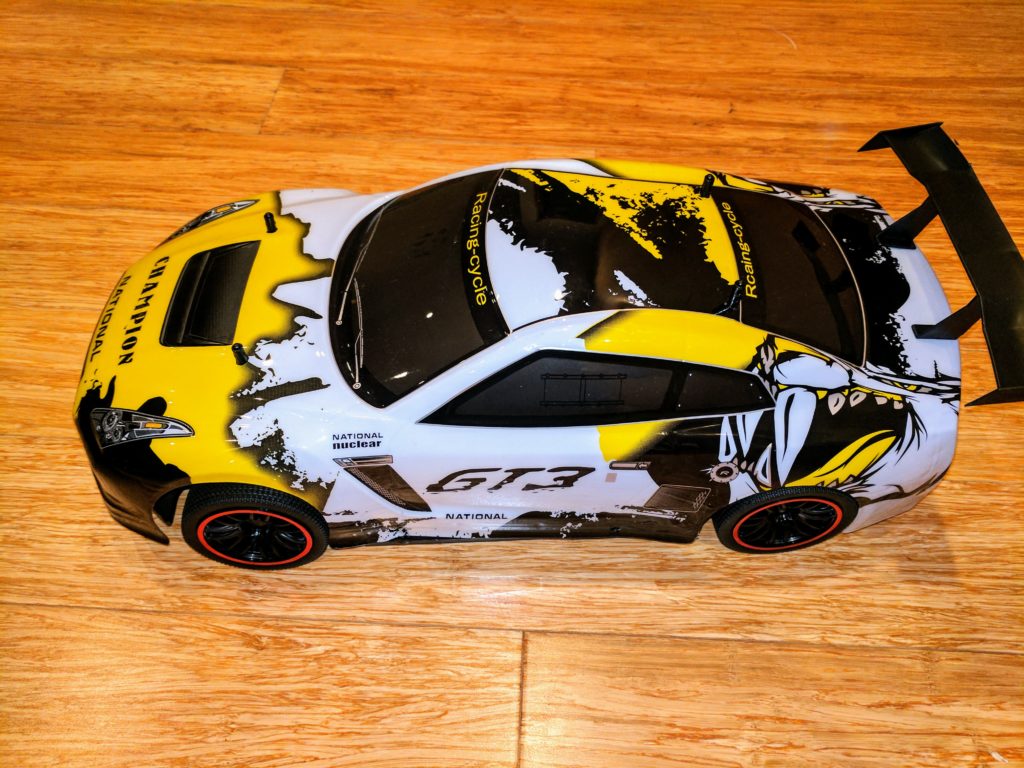
But let’s say you already have, because you saw this cool looking car on Amazon (picture above) for just $49

By the looks of it, it’s got all this great stuff:

  • HIGH PERFORMANCE MOTOR: Can Reach Speeds of Approximately Up to 15 MPH ·
  • RECHARGEABLE LITHIUM BATTERY: High Performance Lithium-Ion Battery · Full Function Pro Steering (Go Forward and Backward, Turn Left and Right) · Adjustable Front Wheel Alignment
  • PRO 2.4GHz RC SYSTEM: Uninterrupted, Interference-Free Driving · Race Multiple Cars at the Same Time
  • Requires 6.4v 500mAh Lithium-Ion Battery to run (Included) Remote Control requires 9v Battery to run (Included)
  • BIG 1:10 SCALE: Measures At a Foot and a Half Long (18″) · Black Wheels with Premium, Semi-Pneumatic, Rubber Grip Tires · Interchangeable, Lightweight Lexan Body Shell with Metal Body Pins and Rear Racing Spoiler · Approximate Car Dimensions, Length: 18″ Width: 8″ Height: 5″

But is it good for autonomy? Absolutely not. Here’s why:

When you get it, it looks fine:

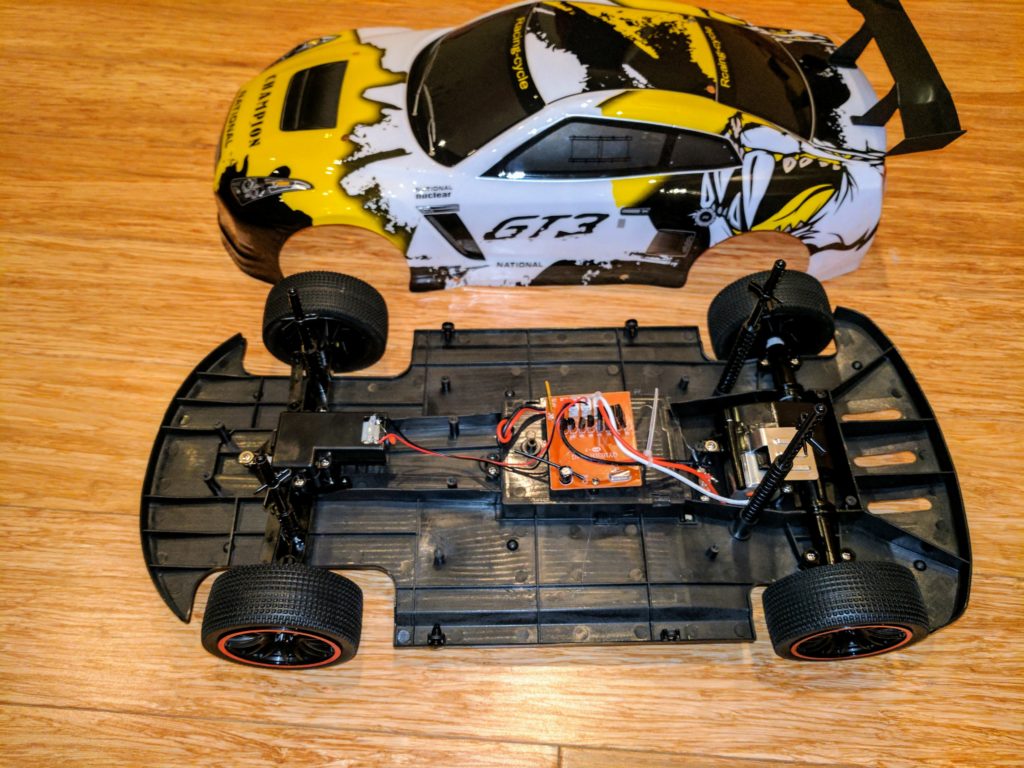
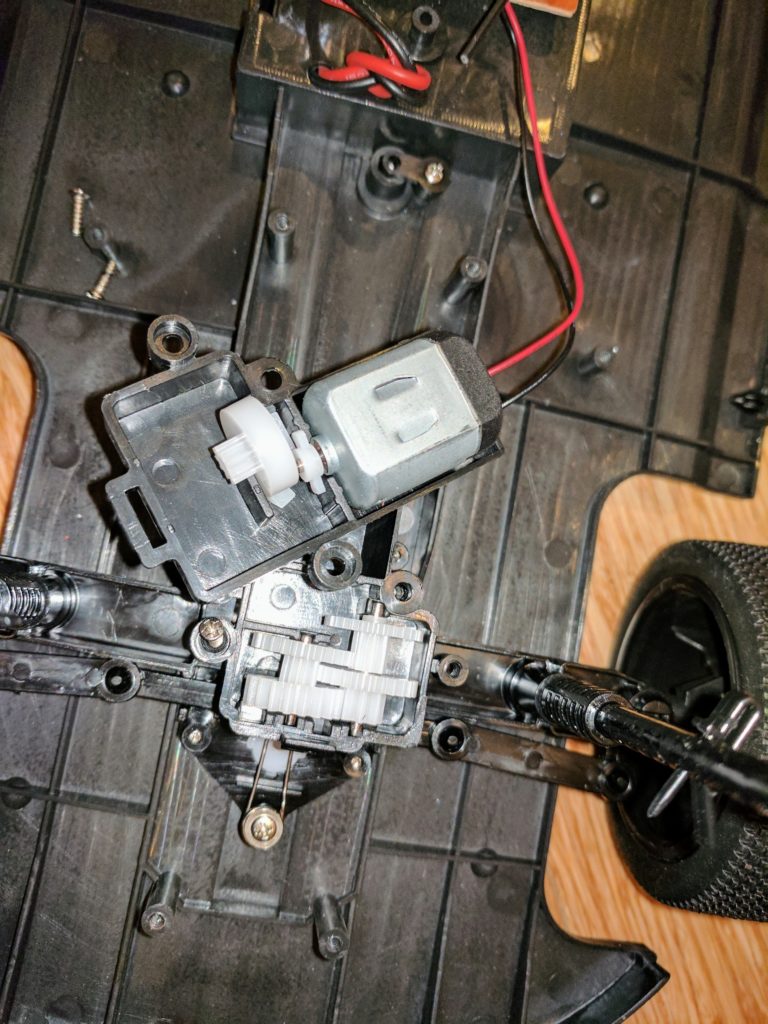
But what’s inside? Erk. Almost nothing:

That’s not servo-driven steering! 🙁  Instead, it’s some weird thing with a motor, some gears and a spring:

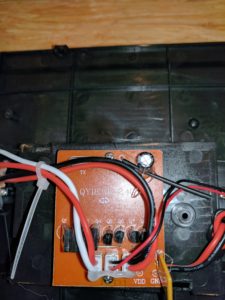
How about the RC? Yikes. Whatever this thing is, you can’t use it (it’s actually an integrated cheap-ass radio and motor controller — at any rate there’s no way to connect a computer to it)

So total write-off? Not quite.

Here’s what you have to do to make it usable:

First, you’ve to to put in a proper steering servo. Rip out the toy stuff, and put in a servo with metal gears (this one is good). Strap it in solidly, like I have with a metal strap here:

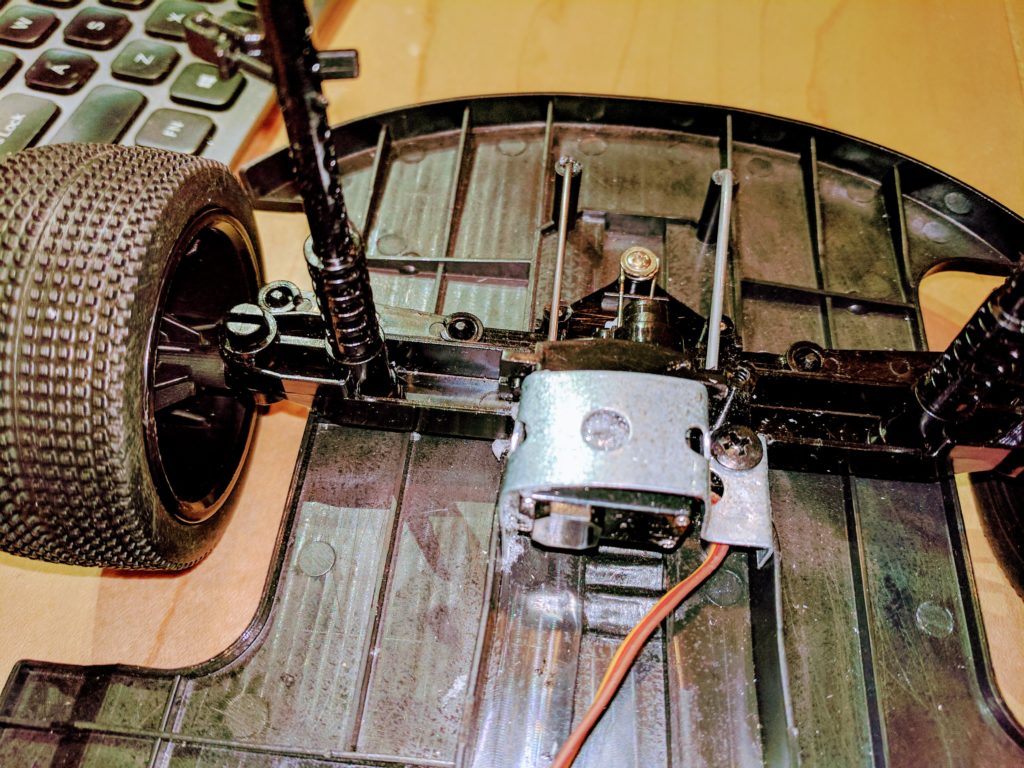
Now you have to put in a proper RC-style motor controller and power supply.  These cheap cars have brushed motors, not brushless ones, so you need to get a brushed ESC. This one is fine, and like most of them has a power supply (called a BEC, or battery elimination circuit), too.

Now you can put in your RaspberryPi and all the other good stuff, including a proper LiPo battery (not that tiny thing that came with it).

Review of the new Nivida Jetson NX for robocars

Nvidia Announces Jetson Xavier NX Developer Kit for $399

It’s now been a couple weeks since Nvidia released its new Jetson Xavier NX board, a $399 big brother to the Jetson Nano (and successor to the TX2) with 5-10 times the compute performance of the Nano (and 10-15x the performance of a RaspberryPi 4) along with twice as much memory (8 Gb). It comes with a similar carrier board as the Nano, with the same Raspberry Pi GPIO pins, but includes built-in Wifi/BT and a SSD card slot, which is a big improvement over the Nano.

How well does it suit DIY Robocars such as Donkeycar? Well, there are pluses and minuses:

Pros:

  • All that computing power means that you run deeper learning models with multiple camera at full resolution. You can’t beat it for performance.
  • It also means that you can do your training on-car, rather than having to export to AWS or your laptop
  • Built-in wifi is great
  • Same price but smaller and way more powerful than a TX2.

Cons:

  • Four times the price of Nano
  • The native carrier board for the Jetson NX runs at 12-19v, as opposed the Nano, which runs at 5v. That means that the regular batteries and power supplies we use with most cars that use Raspberry Pi or Nano won’t work. You have two options:
    • 1) Use a step-up voltage converter like this
    • 2) Use a Nano’s carrier board if you have one. But you can’t use just any one! The NX will only work with the second-generation Nano carrier board, the one with two camera inputs (it’s called B-01)
  • When it shipped, the NX had the wrong I2C bus for the RPi-style GPIO pins (it used the bus numbers from the older TX2 board rather than the Nano, which is odd because it shares a form factor with the Nano). After I brought this to Nvidia’s attention they said they would release a utility that allows you to remap the I2C bus/pins. Until then, RPi I2C peripherals won’t work unless they allow you to reset their bus to #8 (as opposed to the default #1). Alternatively, if your I2C peripheral has wires to connect to the pins (as opposed to a fixed header) you can use the NX’s pins 27 and 28 rather than the usual 3 and 5, and that will work on Bus 1

I’ve managed to set up the Donkey framework on the Xavier NX and there were a few issues, mostly involving that fact that it ships with the new Jetpack 4.4, which requires newer version of TensorFlow than the standard Donkey setup. The Donkey docs and installation scripts are being updated to address that and I’m hoping that by the time you read this the setup should be seamless and automatic. In the meantime, you can use these installation steps and it should work. You can also get some debugging tips here.

I’ll also be trying it with the new Nvidia Isaac robotic development system. Although the previous version of Isaac didn’t work with the Xavier NX, version 2020.1 just came out so fingers crossed this works out of the box.