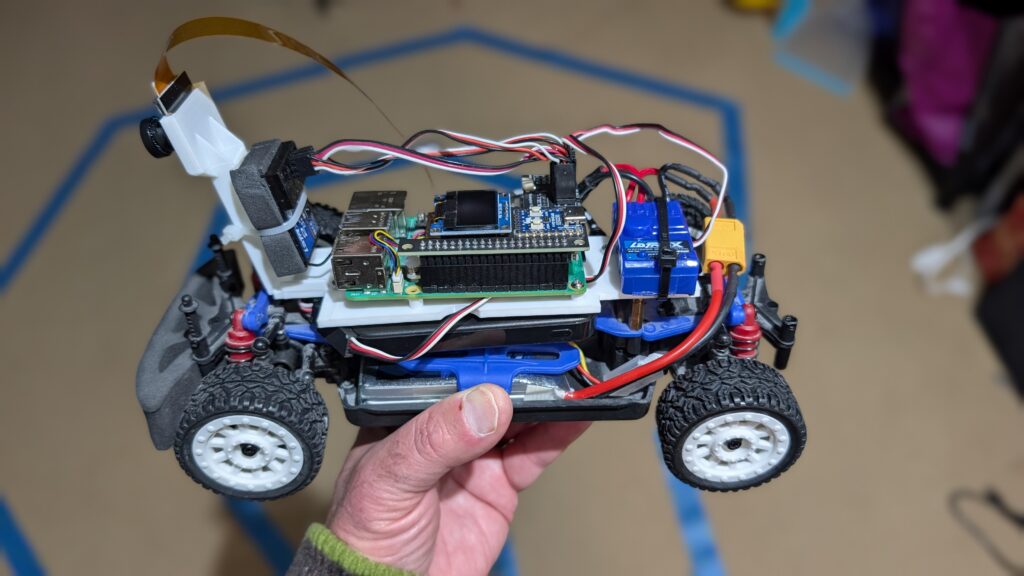
If you’re looking for a car that’s a bit smaller and easier to handle than the Exceed Magnet for Donkeycar, the 1:18th scale LaTrax Rally (https://amzn.to/45jWFDD) is great. Brushed motor, easy to add a third RC channel as an e-stop and fits the RP5 with the RC hat perfectly. You can use the RC it comes with, with no need for an I2C servo board or gamepad controller with limited range.
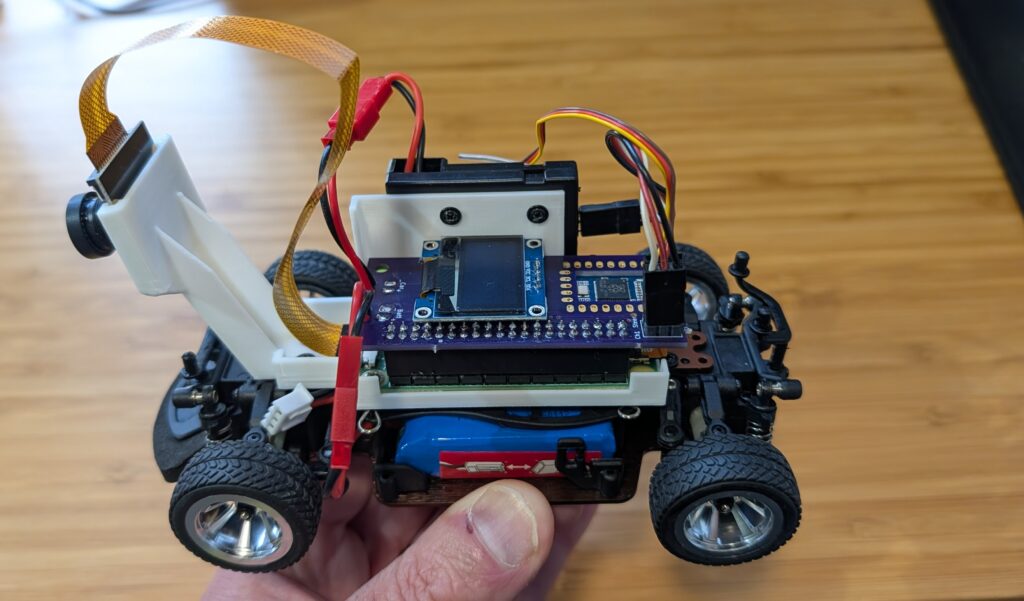
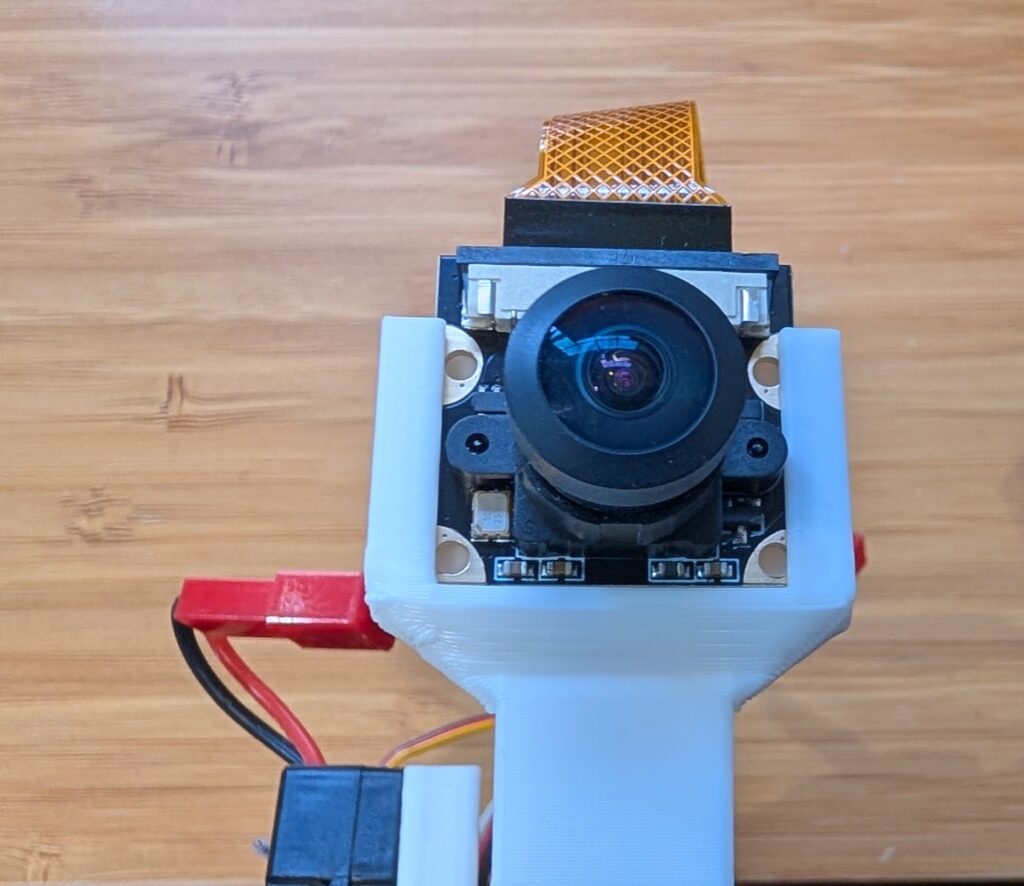
I designed a 3D-printable mount that fits the Pi and camera. Download it here.
If you want to add a third channel as an e-stop, you can follow the instructions here (scroll to bottom)
Yes, you can run Donkeycar, with a full end-to-end neural network driving autonomously, on tiny and cheap 1:28th scale cars! It’s perfect for indoors and small patios that don’t have room for bigger RC cars. Not only that, but you can use the RC controllers they come with. Here’s how to do it for less than $150:
First, you’ll need the car, a Raspberry Pi Zero 2 W and camera, a SD card (128GB or even 64GB is fine) and the Mini RC Hat. (It comes with the mount but if you have a 3D printer, you can also download this STL and print it yourself).
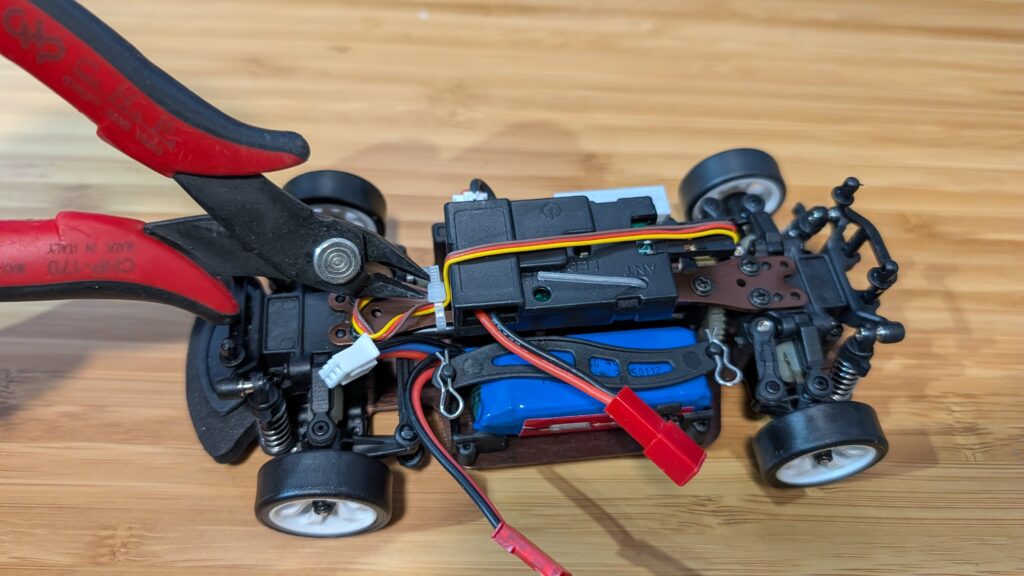
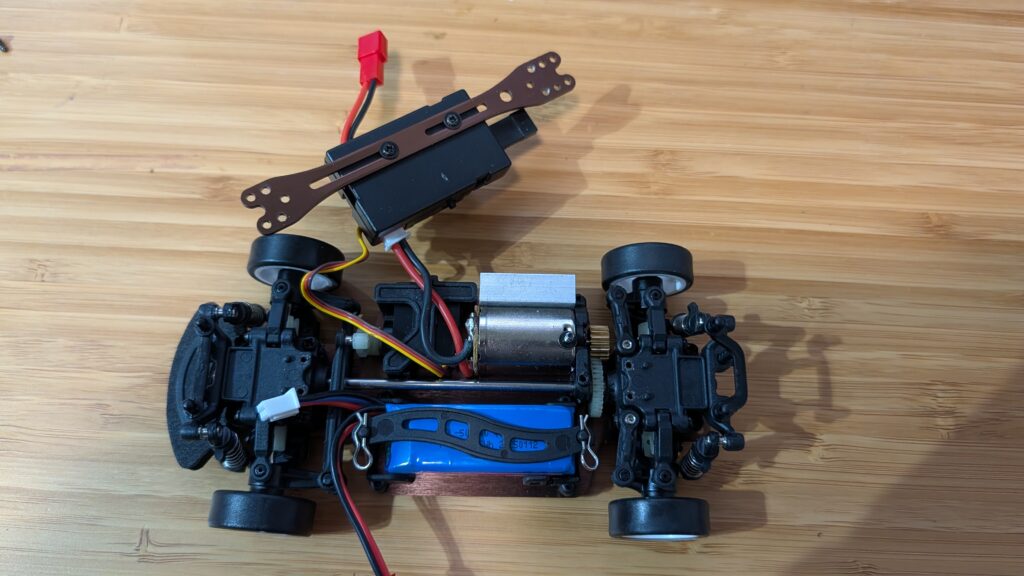
Once you have the car, take off the plastic body shell and remove the center beam as shown in the steps below. Save the screws since you’ll need them later.
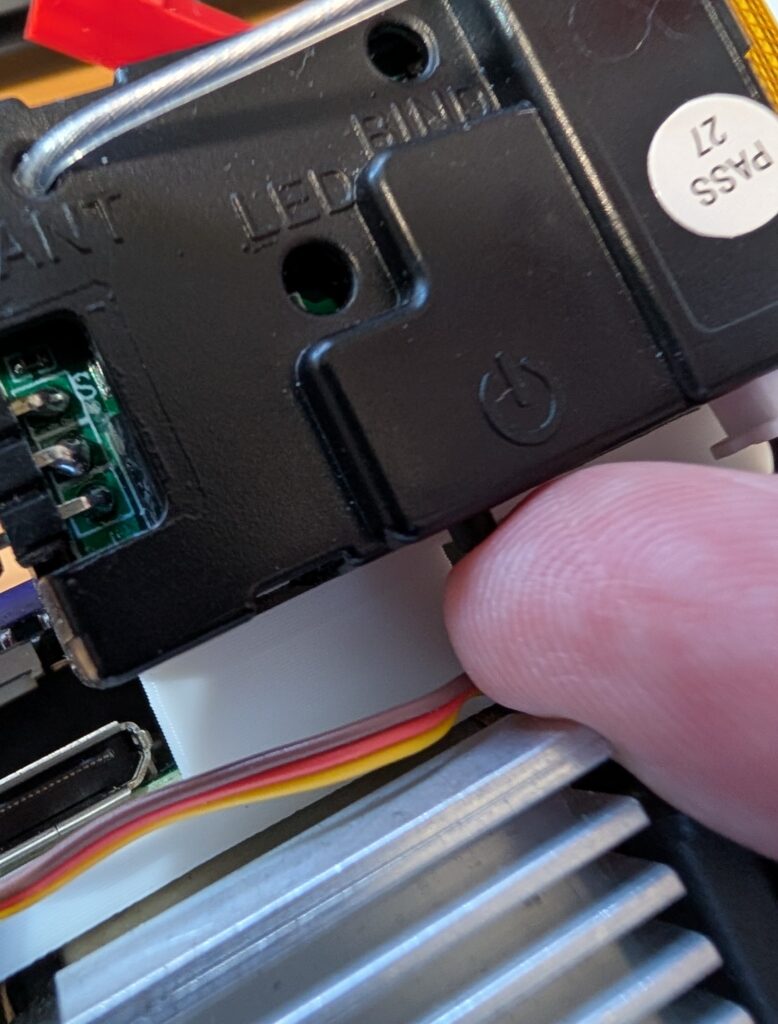
First, clip off the zip tie holding in the steering servo cable
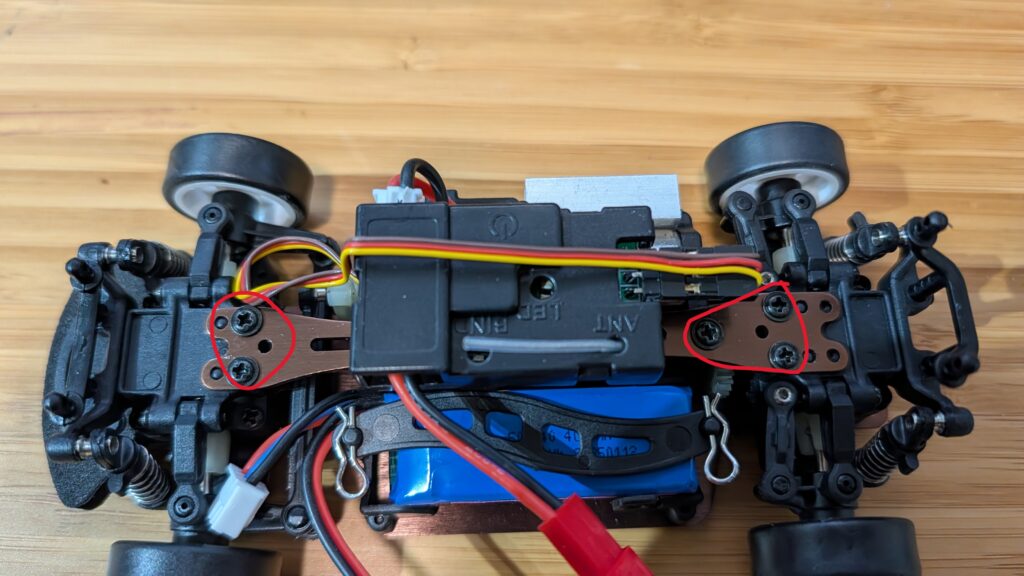
Then unscrew the screws circled in red below
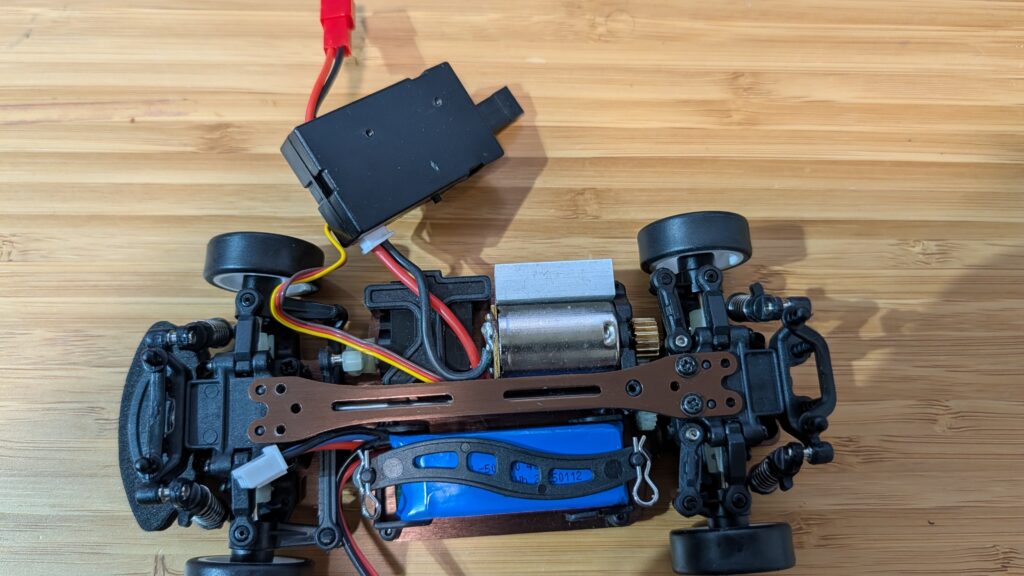
Remove the center beam and unscrew the RC receiver
Replace the beam, just screwing in the two screws at the end. Make sure it’s seated all the way down on the little plastic posts
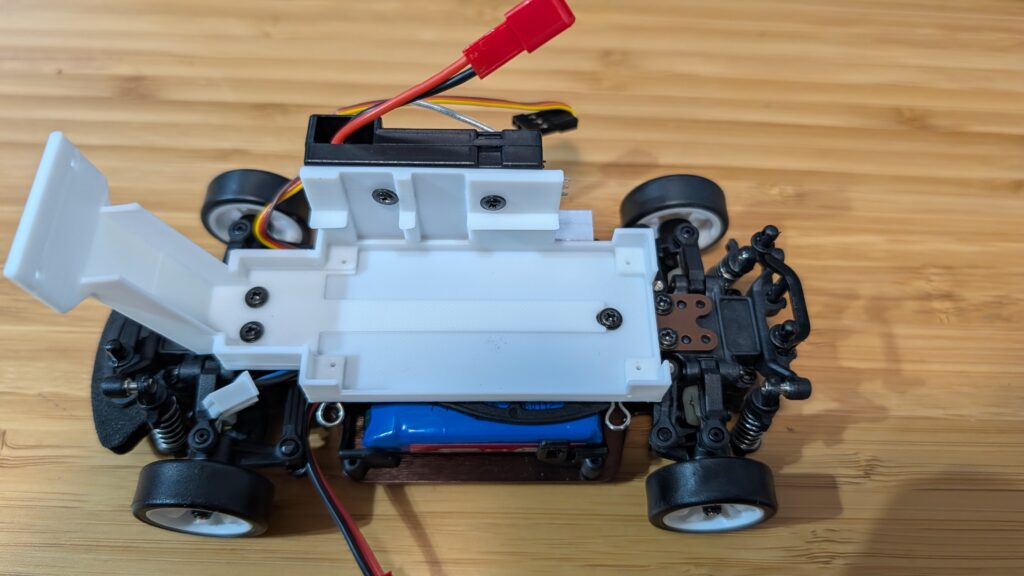
Screw in the Pi Zero mount using the remaining beam screws and screw in the RC receiver with the short screws that it used to mount to the beam
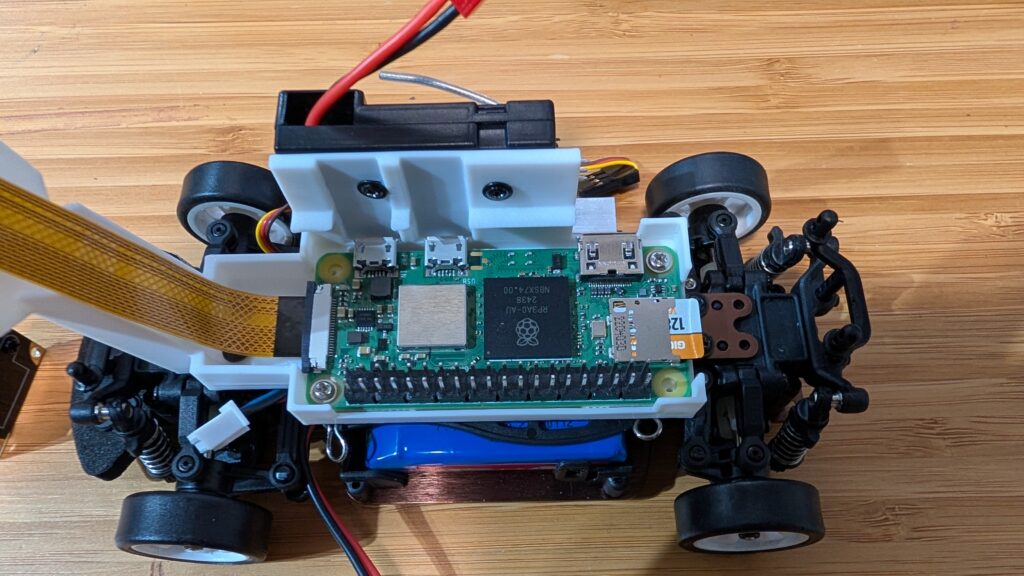
Mount the Pi Zero 2. You only need to screw it in with two screws, diagonally across from each other
Place the camera in the mount slot, with the cable at the top.
For the software, we’ll be using an optimized version of Donkeycar that runs better on the Raspberry Pi Zero 2, which doesn’t have as much memory and compute as the Pi 5. Here’s how to load the software for that:
Step 1
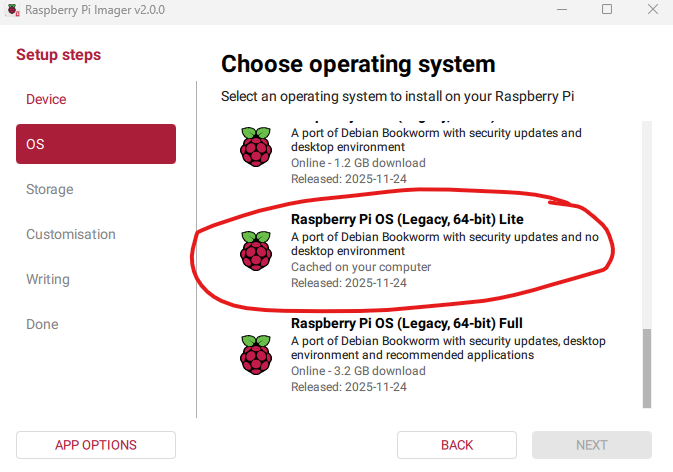
Using the Raspberry Pi Imager, select the Pi Zero 2 W as the target and for the OS, select Bookworm Lite 64 bit (Under “Raspberry Pi OS (other)”).
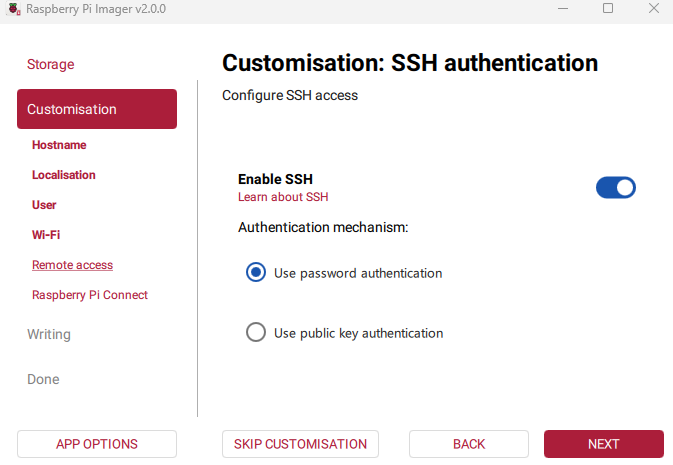
Fill out the rest of the options, including your desired name for the Pi (“donkeycar”) and your preferred username, password and Wifi details. Make sure you enable password SSH access, too:
Then write the image to card.
Step 2 Once it the SD card is done, insert it into the Pi Zero and power it on via the USB port. Once it boots up (green light stops flashing), which will take a minute or two the first time, SSH into via a terminal on your PC like this:
ssh <your username>@donkeycar.local
Once you’re in, go into raspi-config (“sudo raspi-config”) and make the following changes:
Under “Interface Options”, enable I2C and the hardware Serial Port (say “No” to the login shell being accessible over serial and “Yes” to the serial port hardware being enabled)
Under “Advanced Options” expand the filesystem
When you’re done, exit the utility and reboot.
When you log back in, enter this at the command line sudo nano /boot/firmware/config.txt In that file make two changes:
comment out “dtoverlay=vc4-kms-v3d” by putting a “#” in front of it
add this at bottom of file: “dtoverlay=disable-bt”
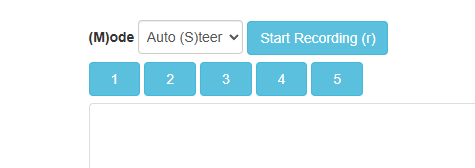
Finally, after you go through the regular recording of data with Donkeycar and then running a trained model, when you switch into auto mode with the web interface, choose “Auto (S)teer”. Because the 1:28th scale cars have an integrated RC receiver and motor controller, it’s too hard to extract the throttle signal and let Donkeycar manage it (lots of trace cutting and soldering would be required), so with these cars you control the throttle manually, while the AI controls the steering.
BTW, it’s not as obvious as it should be how to turn on the car. After you plug into the battery, you have to press this little button on the RC receiver, which will power on everything.