First experiments with JeVois computer vision module
I’m a huge fan of the OpenMV cam, which is a very neat $65 integrated camera and processor with sophisticated built-in computer vision libraries, a Micopython interpreter, and a very slick IDE (a car powered entirely by it came in 2nd in the Thunderhill DIY Robocars race). Now there is a competitor on the block, Jevois, which offers even more power and a lower cost. I’ve now spent a week with it and can report back on how it compares.
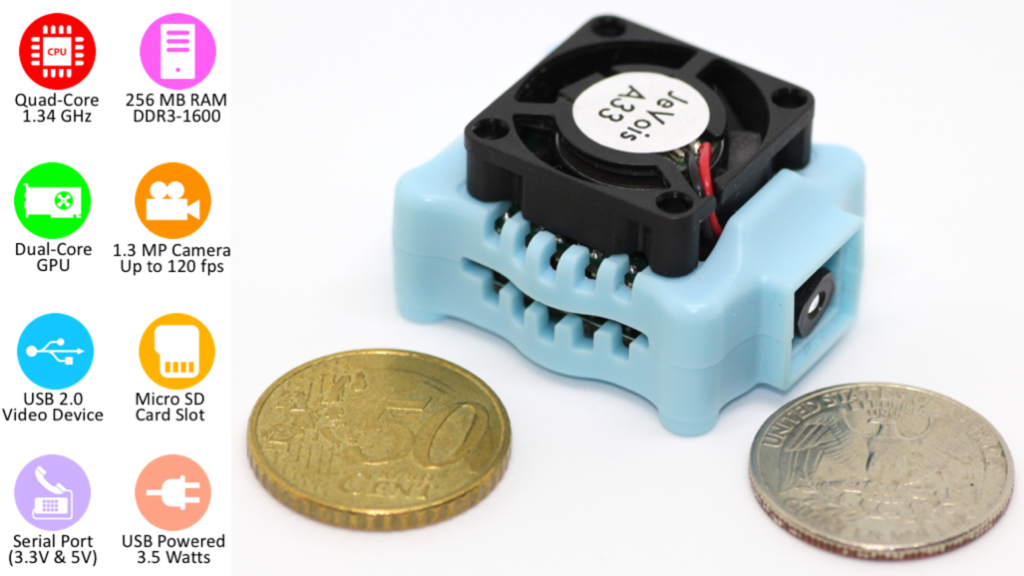
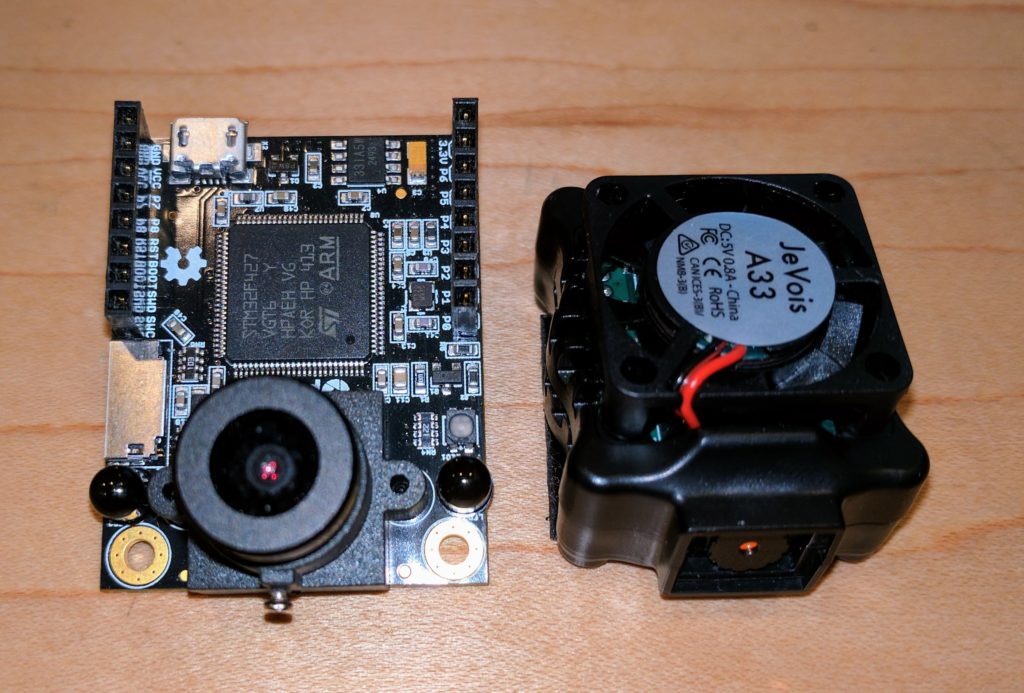
In terms of form factor, it’s a bit smaller than OpenMV
Here’s a quick feature comparison:
| OpenMV | Jevois | |
|---|---|---|
| Camera | 320x240, with good 2.8mm standard lens (can be switched to wide angle or IR) | 320x240, no removable lens |
| Processor | 216 Mhz M7 | 1.34 Ghz A7, with GPU |
| I/O | 3 PWM, Serial, I2C, 1 ADC, 1 DAC, USB | Serial, USB |
| Expansion boards | Wifi, LCD screen, proto board, thermal camera | (none) |
| OS | Micropython | Linux |
| Power consumption | 140 ma | 700-1,000 ma |
| IDE | QT Creator based custom IDE (Mac, Windows, Linux) | (none) |
| Memory | 512KB RAM, 1 MB flash, SD card | 256MB RAM, SD card |
| Price | $65 | $50 |
Both come with a full suite of standard computer vision libraries and examples. (OpenMV’s libraries are here and examples are here; Jevois’s libraries are here and examples are here). Both are well supported on the software side and have good communities. Jevois derives from the Jevois software framework that came out of academic work at USC. OpenMV is the work of small team of very smart computer vision experts, but benefits from the large Micropython community.
Basically, the Jevois board is more powerful, but the OpenMV board is a lot easier to use and more flexible, mostly due to its awesome IDE and native Micropython environment. Both can do our job of driving an autonomous car, so it’s just a question of which board is easier to develop on. Also, why would you get one of these instead of a RaspberryPi 3 and camera, which doesn’t cost much more?
For OpenMV, the reason to use it over RaspberryPi is simply that it’s easier. It’s got a great IDE that works over USB or Wifi that makes interactive use fun, it’s all in one board, and it can drive servos and read sensors without any additional add-on boards. Although the performance is not quite as good as RaspberryPi and it can’t run standard Linux packages like TensorFlow, the included CV libraries are well optimized to make the most of the hardware, and for basic computer vision the included libraries handle most of what you’ll want. (If you want to use neural networks, use the RaspberryPi — these are just computer vision boards).
For Jevois, the reason to use it over RaspberryPi is not as clear. It is potentially more powerful that a RasperrryPi at computer vision, thanks to the built-in GPU, but in practice it seems to perform about the same. But more importantly, it’s much harder to use. After spending a week getting it up and running, I think the only reason to use it over RaspberryPi is in cases where you need a very small, integrated package and can use the built-in modules pretty much as they are without much additional programming.
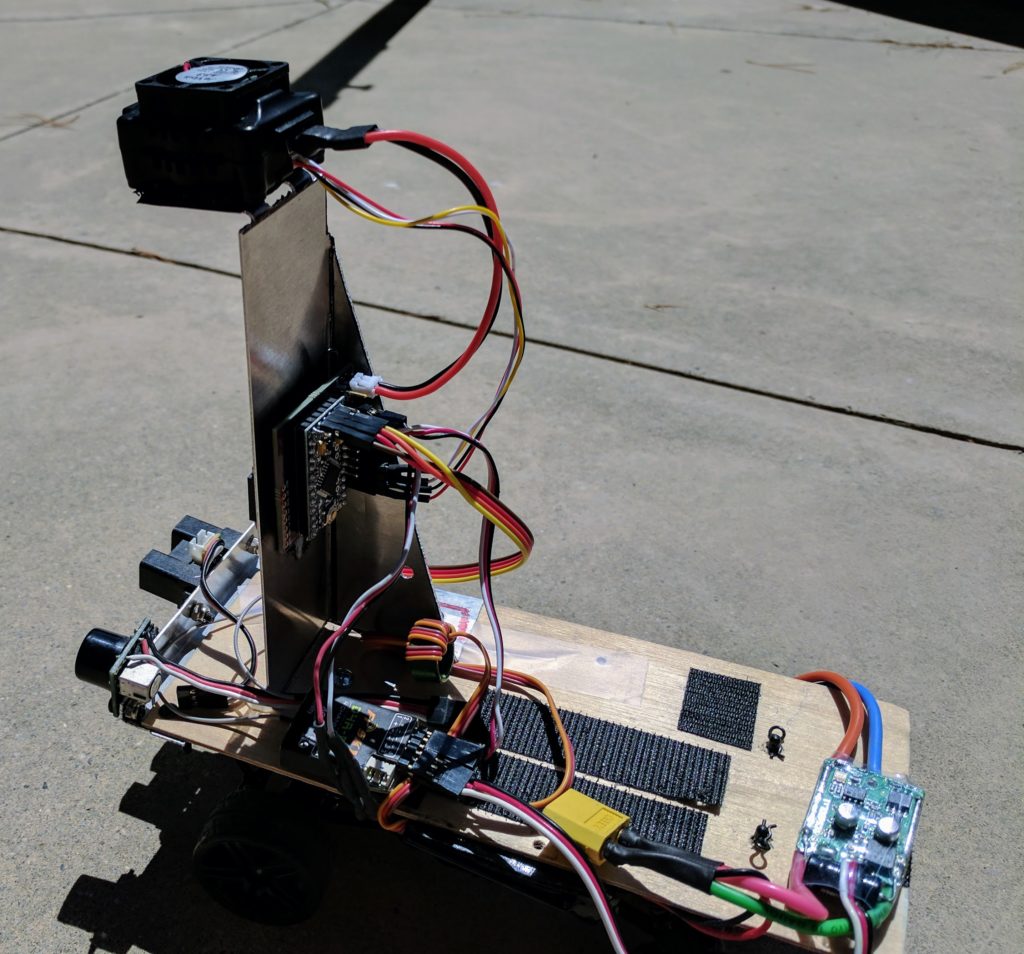
My testbed

I built a small rover to use Jevois’s RoadNavigation function, using a cheap RC car chassis and some plywood and aluminum. The software uses a “vanishing point” algorithm to see the road ahead and keep the rover on it.
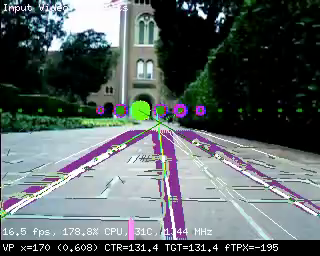
The module works very well when you plug it into a PC via USB and use a video app to test the computer vision modules, such as looking at a picture of a road. What’s much harder, however, is using it in the real world, in an embedded environment where you need to read the data, not just look at the cool on-screen lines.
To do that, you need to do a lot of work on both hardware and software:
Hardware:
You’ll need to get the Jevois talking to an Arduino, which will do the actual control of the car’s servos and motors. You can do that by adapting the included serial cable to connect to an Arduino. A tutorial is here, but in practice it’s a good bit harder than that. In my case, I used an Arduino Mini Pro running Software Serial to talk to the Jevois, so I could program and monitor the Arduino via a FTDI cable or Bluetooth bridge while it was communicating with the Jevois. I also created a custom PCB to attach the Arduino Mini to and break out pins for servos and sensors, although that’s not necessary if you use a regular Arduino and don’t mind a lot of wires hang off it. My Arduino code for this is here.
You’ll also need to power the Jevois via a Mini USB cable. I created my own using these connectors. The regular ESC that drives your car’s motor will not provide enough power for the JeVois, so I used a stand-alone power regulator like this one.
Here’s another shot of the completed car from the back, which shows the Arduino connection. You’ll note that it also has sonar and IR sensors at the front; those are not used now.
The hard part was the software. Basically, the way to use Jevois is primarily through modifying configuration files that are on the module’s SD card. The three necessary ones are here, but I’ll explain the key elements in the next section:
Initscript.cfg:
setmapping 1  # this selects the module that's assigned to Mode 1, which happens to be a video setting called "YUYV 320x240 30.0 fps"
setpar serlog None # this tells it not to save a log file
setpar serout Hard # this tells it to send data to the serial port
streamon # this tells the module to start, even though the board is not connected to USB
Params.cfg:
serialdev=/dev/ttyS0  # this tells it to use the serial port
serial:baudrate=38400 # this sets the baud rate to 38400
serial:linestyle=LF # this sets the line endings to a LF, which make it easier to parse
Videomappings.cfg:
NONE 0 0 0 YUYV 320 240 30.0 JeVois RoadNavigation # this is the key line. It assigns the 320x240 30fps video mode with no USB output to the RoadNavigation module
This last one is the most confusing, but the basics are that for arcane reasons involving not having a proper IDE and having relatively bare-bones video support, the only way you can command the Jevois module from a computer is by commanding changes in video mode. So all modes are mapped to a virtual video mode (confusingly, even if that’s not actually the video mode that it’s using), and the way to tell the board which mode you want it to boot up into is by assigning that module to the video mode number you’re calling in the Initscript.cfg, which runs on startup.
This all took forever to figure out, and needed a lot of help from the team in the forums. But now I’ve done it for you, so you just need to copy the files from here onto your SD card and it should work right out of the box.
In my opinion, this is too hard for beginners. The most perplexing thing about Jevois is that it runs Linux, but there’s no way to get to the Linux command line that I can find. If you could get to Linux via the USB cable (rather than just a weird command input parser that’s a lot like the old modem’s “AT” command set), you’d be able to script this powerful board properly and otherwise use modern programming tools. But as it is, this is a very fiddly matter of taking out the SD card and editing configuration files on a Linux PC, guessing at parameters, sticking it back into the Jevois board, powering it up and praying.
The Jevois software project is very mature and powerful, so I have no doubt that this more user-friendly exposure of its Linux heart and deep AI and CV libraries can be done. But right now the Jevois computer vision board feels like a cool demo (and an incredibly cheap computer vision computer) but not worth the hassle to use for real work when you can do so much more with a RaspberryPi in much less development time. Perhaps the next version will improve this.
[UPDATE: JeVois has now added the ability to read and write files on the SD card via USB, as well as Python 3.5 support, which is definitely a step in the right direction]